
How I’m using Jekyll in 2016
I first started using Jekyll — a static site generator, back in 2012. In the four years since, it has indirectly introduced me to a host of new tools and ways of building websites. Hell, I wasn’t even using version control when developing this site — so you know a lot has changed.
What follows is a brain dump documenting my approach to using Jekyll, how that’s evolved over the years, and any other learnings I’ve picked up along the way. This is mostly an excuse for me to capture and reflect on things, but maybe you’ll find some useful nuggets in the mess that’s sure to follow.
Converting and restructuring content
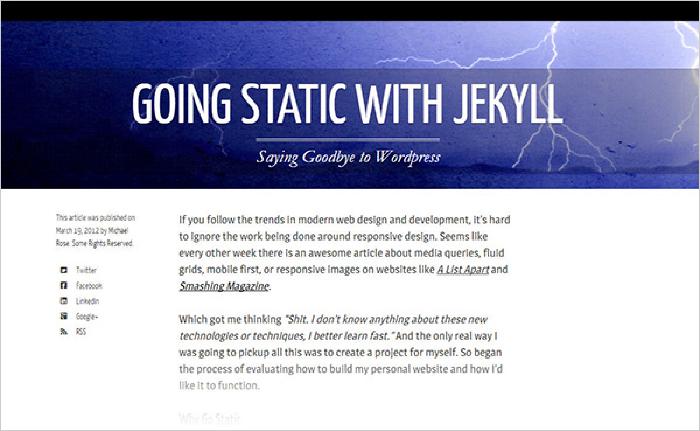
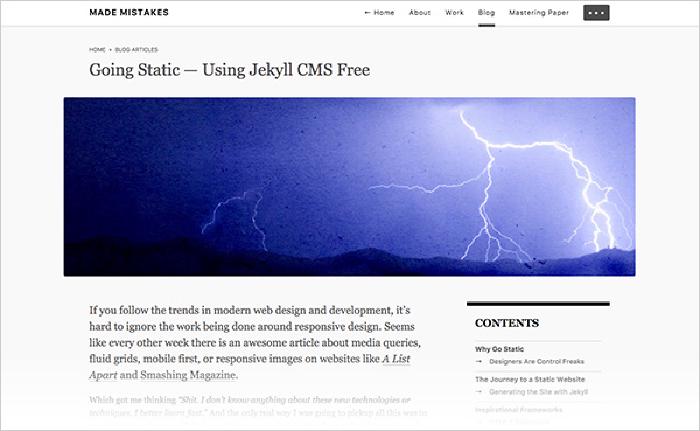
To learn how Jekyll works I set off on a journey to turn a Wordpress powered site into the static version you see now. I read several tutorials, learned Kramdown1 and Liquid, blogged about the process, and eventually ended up with something I was happy with — all without a database or CMS.
Posts for all the things
As Jekyll has matured and added features, the complexity at which I use it has too. In those early days, content could only be considered a post or page. Posts became more valuable to me than pages since they could reap the benefits of site.tags and site.categories for creating archives and as a way to surface “related content”.
Posts made a lot of sense then because the only type of content I had on the site were blog posts. As I started incorporating things like portfolio pieces into the site I used categories as a way to structure content by “post type.” For example, Blog Articles would get categories: articles added to their YAML Front Matter and path: /:categories/:title/ in _config.yml to produce pretty URLs like /articles/jekyll-is-the-best/.
A drawback I hit with this method was reliable pagination between posts. Jekyll provides the variables page.previous and page.next to help create previous/next style links between posts. But because I was trying to section off posts by category, these links didn’t always behave as expected.
For example, when reading a post in the articles category, I’d expect the NEXT → link to show the next article post. Instead, something from the portfolio category came up because it was the next item in the site.posts array. With plugins or a messy bit of Liquid you could probably filter on the current category and get around this, but I never took it that far.
Details like this drive me bonkers, so instead I opted for a You May Also Enjoy module that displays three related posts (with the help of a plugin2) at the bottom of the page. In my eyes, this provided a better reading experience even if my site took longer to generate at build…
| Jekyll version | Build time | Posts | |
|---|---|---|---|
| Then | 0.12.1 | < 1s | 25 |
| Now | 3.1.1 | 121.62s | 980 |
It’s no coincidence that my build times went from under a second to a few minutes as I hit almost 1,000 posts. Moving to solid-state drives and reducing the amount of Liquid for loops in my layouts and includes has helped — but I still have ways to go if I want to speed things up further.
The new --incremental regeneration feature will eventually play a big role in speeding things up. On a default jekyll new site it works really well, but unfortunately I haven’t had much luck getting it to play nicely with the plugins I use. Work currently being done on this feature seems like its going in the right direction, so I’m sure in time things will sort out.
For now the best I can do is use the new Liquid Profiler3 to identify problematic bits and simplify where I can. I add new content so infrequently that it really isn’t a bother waiting 2 minutes for a build to finish, but damn it would be nice to hit < 1s again!
jekyll build --profile

Configuration file: _config.yml
Configuration file: _config.dev.yml
            Source: /Users/michael/Sites/made-mistakes-jekyll
       Destination: /Users/michael/Sites/made-mistakes-jekyll/_site
 Incremental build: disabled. Enable with --incremental
      Generating...

Filename                               | Count |     Bytes |   Time
---------------------------------------+-------+-----------+-------
_layouts/default.html                  |  1379 | 42258.40K | 36.456
_layouts/autopage_tags.html            |   344 |  7192.14K | 27.259
_layouts/post.html                     |   994 |  5557.85K | 26.212
_includes/posts-paginated.html         |   354 |  6967.45K | 25.228
_includes/entry.html                   |   351 |  6826.94K | 24.220
_includes/head.html                    |  1379 | 23448.94K | 22.107
_includes/page-intro.html              |  1378 |  1879.93K | 17.263
_includes/head-seo.html                |  1379 |  2031.35K | 12.697
_includes/pager-category.html          |   994 |   518.13K |  4.545
_includes/contact-list.html            |  1379 |  1424.79K |  4.059
_includes/favicons.html                |  1379 |  1082.73K |  3.544
_includes/comment.html                 |    42 |  1172.45K |  3.157
_includes/comments.html                |    52 |   939.71K |  2.429
sitemap.xml                            |     1 |   117.42K |  2.127

                    done in 131.732 seconds.
 Auto-regeneration: disabled. Use --watch to enable.
Collections
When collections were introduced back in v2.0, I decided to build out a Frequently Asked Questions section on my site to familiarize myself with the feature.
Creating a collection of FAQ items turned out to be easier than expected. Make a _faqs directory populated with Markdown-formatted text files (like any other post or page), configure the collection in _config.yml, build an index page to display all of the collection’s documents, and done!
# _config.yml
collections:
  faqs:
    output: true
    path: /:collection/:path/
    title: FAQs
As collections have elevated in status they’re increasingly becoming my preferred way of working with static content. In addition to the FAQs collection I’ve also created one to build a “living style guide” of sorts — documenting the look and feel of the site with visual representations and code samples.
Eventually I plan to convert more posts into their own collections. Posts currently categorized as work seem like the obvious choice since its always felt funny shoe-horning them into _posts. As far as others? Not sure yet.
What I’d like to investigate deeper is adding taxonomies to collections and how they mingle with the tags and categories already in site.posts. I’m not exactly sure if they coexist with site.tags or how tag archives generated by Jekyll Archives might see them. A job best saved for a rainy day I suppose…
Pages for everything else
Content that doesn’t need to be ordered chronologically or grouped in any way becomes a page. To keep things nice and tidy I place all of the source .md or .html files into a _pages directory and assign path overrides in the YAML Front Matter of each.
An architecture like this helps centralize the content so you’re not poking around trying to locate files. Meaningfully naming files should be the goal. Avoid patterns like /about/index.md as it makes distinguishing between multiple index.md files harder.
project-name/
├── _assets/
├── _data/
├── _drafts/
├── _includes/
├── _layouts/
├── _pages/
|   ├── 404.md               # custom 404 page
|   ├── about.md             # about page
|   ├── contact.md           # contact page
|   └── home.md              # home page (eg. <root>/index.html)
├── _posts/
├── .gitignore
├── _config.yml
└── Gemfile
And then in each Markdown file I set a path that fits in with the format used on the rest of the site.
Examples: about.md ~> path: /about/, home.md ~> path: /, contact.md ~> path: /contact/, etc.
An evolution
From a workflow perspective, things have mostly stayed the same. I still “write in Markdown”, build this site locally, and push the contents of the _site directory to a web server. On the development side, however, complexities have been introduced in an effort to optimize and improve website performance.
Tinkering and experimenting with the visual design of Made Mistakes whenever I want is important to me. Since I work on both Mac OS X and Windows based devices I need tooling that plays nicely with each. Below are the tools, configurations, and Jekyll plugins that help do that.
Bundler
Installing Ruby, Bundler, and Ruby Gems were all new to me four years ago. Running jekyll build on different operating systems felt like a crap shoot. A setup that worked one day would most certainly break the next after updating Jekyll on a Windows machine.
I eventually learned to embrace Bundler from the advice of numerous Stack Overflow threads and GitHub issues. Since Bundler is the official way to install Jekyll it wasn’t that big of a leap for me to start using a Gemfile to manage all dependencies. To do that:
- Run
bundle initto create an emptyGemfile - Add
gem 'jekyll'and any other gems to theGemfile.
# Made Mistakes example Gemfile

source 'https://rubygems.org'

gem 'breakpoint'
gem 'wdm', '~> 0.1.0' if Gem.win_platform?
gem 'mini_magick'
gem 'autoprefixer-rails'
gem 'uglifier'

# Jekyll and Plugins
gem 'jekyll'
gem 'jekyll-archives'
gem 'jekyll-tagging-related_posts'
group :jekyll_plugins do
  gem 'jekyll-assets', github: 'jekyll/jekyll-assets'
  gem 'jekyll-sitemap', github: 'jekyll/jekyll-sitemap'
end
Now when running bundle install each of the gems specified above are installed and a Gemfile.lock is created listing all of the dependencies. Prepending all Jekyll commands with bundle exec ensures only the versions in Gemfile.lock are executed helping to mitigate conflicts.
Committing both of these Gemfiles to a git repository also makes it easy to revert back if a gem update goes bad. Sure it’s a few more characters to type, but the headaches it solves are more than worth it. You can even write shortcut tasks with Rakefiles to eliminate the extra keystrokes — if automation is your thing (more on that below).
Environments and configurations
With the introduction of asset related plugins and various other build steps, I eventually settled on two Jekyll configuration files. A default _config.yml with production settings and _config.dev.yml for development specific ones.
The cool thing is you can chain together these configuration files, overriding settings from the previous. For example, when building locally I’d like {{ site.url }} and {{ site.disqus-shortname }} to default to their development equivalents for testing purposes. Adding the following values to _config.dev.yml overrides the ones in _config.yml:
url: http://localhost:4000
disqus-shortname: mmistakes-dev
A development server can then be fired up with the relevant settings using…
bundle exec jekyll serve --config _config.yml,_config.dev.yml
Going one step further a Jekyll environment can be specified as well. By default Jekyll runs in development with a value of JEKYLL_ENV=development. The compress.html layout and Jekyll-Assets plugin both make use of this triggering HTML, CSS, and JavaScript compression with the following command:
JEKYLL_ENV=production bundle exec jekyll build
set JEKYLL_ENV=production
Other configurations
As mentioned earlier I have a moderately sized Jekyll site at 1,005 posts. Combine that fact with an /images/ directory that is close to 2 GB, a liberal use of Liquid for loops, and generator plugins like Jekyll Archives — you get site builds that are far from instant. And in the rare cases when I run jekyll clean to flush caches and everything in /_site/, builds can take over 15 minutes as the Jekyll Picture Tag plugin regenerates appropriately sized hero images for every posts. Yikes!
So as you might have guessed, I sure as hell never start up a server with auto-regeneration enabled. Instead, I start with bundle exec jekyll serve --no-watch and then run a rake task to manually build every time I want to check changes locally.
When working on the site’s design it can be cumbersome to sit through a 2 minute build just to check a CSS change. But until --incremental works reliably its something I have to suffer through (or use plugins to isolate posts at build). Its a good thing I do a lot of my ‘designing’ in-browser with Chrome’s DevTools before editing the actual source as this hasn’t been too annoying.
Automation tools and shortcuts
To save time (and my sanity) when working on the site locally, I employee a few tools to perform common development related tasks.
Grunt
Grunt describes itself as “the JavaScript task runner.” Grunt has a fairly large set of plugins that can handle pretty much any mundane task you through at it.
Prior to Jekyll natively supporting Sass I used Grunt plugins to pre-process .less files, concatenate a set of JavaScript files, and optimize image assets. Now that I’m running Jekyll 3.1 and the Jekyll-Assets plugin I no longer need Grunt to mess with my scripts and stylesheets.
These days I use Grunt solely for optimizing images and SVGs with the following plugins:
// Grunt plugins in package.json
"devDependencies": {
  "grunt": "~0.4.2",
  "grunt-newer": "^0.7.0",
  "grunt-imgcompress": "~0.1.1",
  "grunt-svgmin": "~0.3.1",
  "grunt-svgstore": "^0.5.0"
}
When I add new JPEG or PNG assets to /images/ I use the following command to optimize them — reducing their file size and speeding up page loads.
grunt images
On the SVG side of things any files added to /_svg/ are optimized and merged into a single sprite map with the following command:
grunt svg
In combination with both of these tasks I use the grunt-newer plugin. This dramatically speeds up things as only new and modified files are processed.
Rake
On the build and deployment side of things I have a few shortcut tasks defined in Rakefile.rb. As mentioned earlier typing out bundle exec before Jekyll commands can get old fast. Instead, I use the following:
Start up a Jekyll server
rake serve
Production build, development build, and build with drafts
rake build
rake build:dev
rake build:drafts
Deployment
Since I self-host my site I need a way of pushing the contents of the /_site/ directory after a production build. Years ago I’d use Cyberduck or FileZilla to transfer everything over slowly to Media Temple via FTP.
These days I use rsync to speed that transfer way the hell up, sending only new and modified files. It’s also a task that I can automate by adding the following to my Rakefile.rb file.
# Usage: rake rsync
desc "rsync the contents of ./_site to the server"
task :rsync do
  puts "* rsyncing the contents of ./_site to the server"
  system "rsync --perms --recursive --verbose --compress --delete --chmod=Du=rwx,Dgo=rx,Fu=rw,Fgo=r _site/ [email protected]"
end
As part of my deployment process I also run tasks that notify Ping-O-Matic, Google, and Bing that the site has been updated and to index the sitemap.xml and atom.xml feeds. These tasks look something like this:
# Usage: rake notify
task :notify => ["notify:pingomatic", "notify:google", "notify:bing"]
desc "Notify various services that the site has been updated"
namespace :notify do

  desc "Notify Ping-O-Matic"
  task :pingomatic do
    begin
      require 'xmlrpc/client'
      puts "* Notifying Ping-O-Matic that the site has updated"
      XMLRPC::Client.new('rpc.pingomatic.com', '/').call('weblogUpdates.extendedPing', 'mydomain.com' , '//mydomain.com', '//mydomain.com/atom.xml')
    rescue LoadError
      puts "! Could not ping ping-o-matic, because XMLRPC::Client could not be found."
    end
  end

  desc "Notify Google of updated sitemap"
  task :google do
    begin
      require 'net/http'
      require 'uri'
      puts "* Notifying Google that the site has updated"
      Net::HTTP.get('www.google.com', '/webmasters/tools/ping?sitemap=' + URI.escape('//mydomain.com/sitemap.xml'))
    rescue LoadError
      puts "! Could not ping Google about our sitemap, because Net::HTTP or URI could not be found."
    end
  end

  desc "Notify Bing of updated sitemap"
  task :bing do
    begin
      require 'net/http'
      require 'uri'
      puts '* Notifying Bing that the site has updated'
      Net::HTTP.get('www.bing.com', '/webmaster/ping.aspx?siteMap=' + URI.escape('//mydomain.com/sitemap.xml'))
    rescue LoadError
      puts "! Could not ping Bing about our sitemap, because Net::HTTP or URI could not be found."
    end
  end
end
And with a simple rake deploy I can build a production-ready version of the site, rsync everything over to my web host, and notify search engines there’s new content to crawl.
Asset pipeline
Originally I wrote my stylesheets in Less4 and squished them down with a Grunt task. Then one day Jekyll grew up and started supporting Sass files natively so I converted everything over and was able to remove a dependency. Hooray!
Not content with that workflow I eventually leveled-up by incorporating the Jekyll-Assets plugin into the mix. It’s a powerful gem with an assortment of tags that make cache busting and inlining assets (something I’ll get to in a minute) so much easier.
It also supports the wonderful PostCSS plugin Autoprefixer, for automatically adding vendor prefixes to CSS rules. CSS declarations like this:
.post__content {
  display: flex;
  flex-direction: column;
  flex-wrap: nowrap;
  margin-top: 1em;
}
Get properly prefixed without any additional effort…
.post__content {
  display: -webkit-box;
  display: -webkit-flex;
  display: -ms-flexbox;
  display: flex;
  -webkit-box-orient: vertical;
  -webkit-box-direction: normal;
  -webkit-flex-direction: column;
  -ms-flex-direction: column;
  flex-direction: column;
  -webkit-flex-wrap: nowrap;
  -ms-flex-wrap: nowrap;
  flex-wrap: nowrap;
  margin-top: 1em;
}
Even better, when browsers don’t need this extra prefixed nonsense — Autoprefixer will leave it out based on the browsers: set in my Jekyll config.
For this site I target the last 2 versions of each major browser, browsers that have a global usage of over 5%, or are Internet Explorer 9+.
# _config.yml
assets:
  autoprefixer:
    browsers: ["last 2 versions","> 5%","IE 9"]
Page speed optimizations
Critical path CSS
To speed up page loads I’ve gone to the trouble of inlining the critical CSS needed to render a page. I didn’t use any fancy tools to determine what was critical but instead structured my SCSS partials in a way that the important visual stuff comes first.
With a focus on modular CSS, I can build critical and non-critical flavors by @import-ing the bits needed for each fairly easily. Using the Jekyll-Assets asset_source tag5 to output the contents of critical.scss into the <head> of ever page and a bit of JavaScript to asynchronously load the non-critical stuff.
<head>
  <style type="text/css">
    {% capture criticalcss %}
      {% include critical.scss %}
    {% endcapture %}
    {{ criticalcss | scssify }}
  </style>
</head>
Responsive images revisited
Inlining the above the fold CSS and lazy loading the rest wasn’t the only site performance improvement I’ve made. The biggest hurdle I’ve come across working with Jekyll is image management. Since Jekyll isn’t a CMS and I have thousands of image assets, finding a solution to serve them responsively has been challenging.
Since day one I’ve been trying to get closer to this dream scenario:
- Link images in a post/page with just Markdown (e.g.,
). - Automatically generate smaller sizes (perhaps specified in
_config.yml). <img>elements are spit out with the correctsrcsetandsizesmarkup.
To my knowledge there are no Jekyll plugin that do this, though some get close — Jekyll-Picture-Tag, Jekyll-Responsive-Image, Jekyll-Srcset. Jekyll-Picture-Tag does most of what I want (automatically size images from presets) with tags like {% picture image.jpg %}, which means I have to forgo linking to images with plain Markdown for now.
When setting up the plugin I focused in on the large hero images and decided to worry about the others later. Replacing Markdown images with {% picture %} tags for 1,000 posts just isn’t feasible yet. Since the hero images are Liquid driven they proved much easier to implement.
All it took was changing <img src="{{ page.image.feature }}" alt=""> to {% picture hero {{ page.image.feature }} alt="" %} and settling on this configuration:
picture:
  source: "images/_originals"
  output: "images"
  markup: "picture"
  presets:
    hero:
      attr:
        class: "page__hero-image"
        itemprop: "image"
      ppi: [1]
      source_1600:
        media: "(min-width: 1600px)"
        width: "1600"
      source_1024:
        media: "(min-width: 1024px)"
        width: "1024"
      source_768:
        media: "(min-width: 768px)"
        width: "768"
      source_600:
        media: "(min-width: 600px)"
        width: "600"
      source_default:
        width: "320"
Now when a high resolution image is placed in /images/_originals/ and feature: /assets/images/image.jpg added to the YAML Front Matter of a page, this markup spits out automatically:
<picture>
  <source srcset="image-1600.jpg" media="(min-width: 1600px)">
  <source srcset="image-1024.jpg" media="(min-width: 1024px)">
  <source srcset="image-768.jpg" media="(min-width: 768px)">
  <source srcset="image-600.jpg" media="(min-width: 600px)">
  <source srcset="image-320.jpg">
  <img src="image-320.jpg" class="page__hero-image" itemprop="image" alt="">
</picture>
By default, the plugin hashes the filenames, but I disabled that since it was getting hard to manage between Mac OS X and Windows environments (each created their own hashed version of the file even when visually the same).
Currently, this plugin only supports the <picture> element which is great for art directed responsive images, but a bit overkill in this case. Having the option to use srcset instead would be preferred, but since I’m not a Rubyist making that change to the plugin is out of my hands until someone else tackles it.
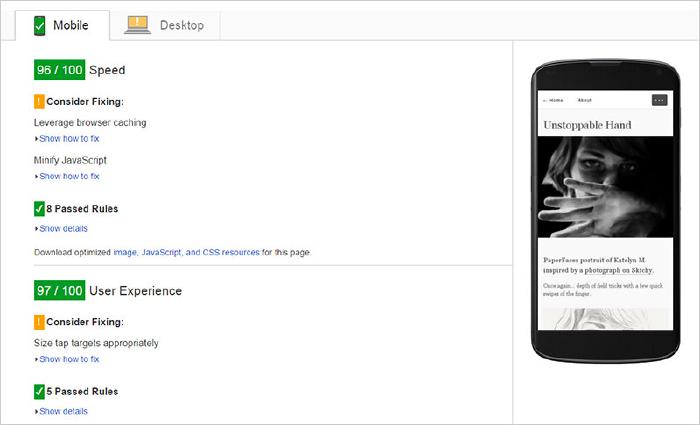
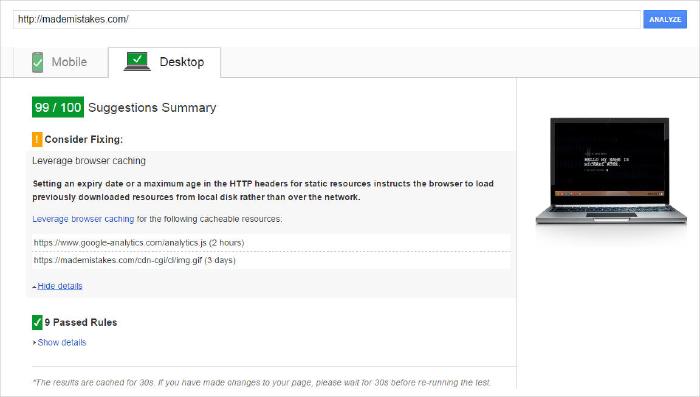
73/100 improving to 96/100.The one big drawback I’ve experienced using this plugin has been an increase in build times. If I don’t instruct Jekyll to keep_files: ["images"], every time I run Jekyll over 1,000 images will go through the process of being resized into smaller files. This takes forever and even longer when uploading them all to my web server (another reason I disabled MD5 hashed filenames). Baby steps right?
A focus on content
Showcasing a post or page’s content is still the primary goal of the layouts I designed years ago. It’s been a balancing act as I’ve tried to incorporate navigation systems (main menu, table of contents, page breadcrumbs, tag archives), reader submitted comments, related posts, and social sharing links in complimenting and responsive ways.
The core elements have remained unchanged since I originally launched the site:
- A neutral design to avoid competing with page content (text and image).
- Well defined structure, way points for navigating the site, and related content to encourage deeper browsing.
- Readable typography to help showcase long-form articles and tutorials.
Building everything from scratch has really given me the chance to focus on all of these points. It’s also helped me avoid the trap of adding useless widgets and other cruft because they’re trivial to install — something I was guilty of when using plug and play software like Wordpress.
The challenge has been finding ways to surface related content and displaying them in an attractive manner. I wanted to take a simple text list of posts and turn them into something more visual. With the thought that no one was going to sift through a bunch of boring text unless there were images to break up things.
Listing posts
Archive page layouts I’ve designed over the years have gone through several incarnations. I went from plain text lists, to thumbnail images, to listings with a short excerpt, to something that combined them all.
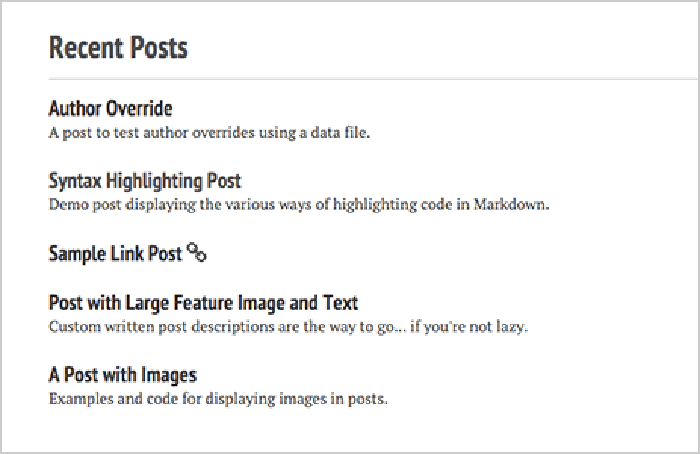
Title/excerpt versus image/date/title/excerpt post lists.

What I’m currently using are tiles for related and featured post modules and a more traditional plain list for archive pages.

Related posts are dynamically pulled from site.related_posts and augmented with a Jekyll plugin to make matches based on post.tags. The following tile logic resides in an include file and is ready to be used in layouts or within post/page content.
<!-- /_includes/related.html -->
<h3 class="tile__header">You May Also Enjoy</h3>
<div class="tiles">
  {% for post in site.related_posts limit:3 %}
    <article class="tile__item" itemscope itemtype="http://schema.org/CreativeWork">
      <meta itemprop="text" content="{{ post.excerpt | strip_html }}">
      <a href="{{ post.url }}">
        <img src="{% if post.image.teaser %}{{ post.image.teaser }}{% else %}{{ site.teaser }}{% endif %}" itemprop="image" alt="{{ post.title }}">
        <h3 class="tile__title" itemprop="headline">{{ post.title | markdownify | remove: '<p>' | remove: '</p>' }}</h3>
      </a>
      {% if post.categories %}
        {% assign category_slug = post.categories | first %}
        {% assign category = site.data.slugs[category_slug] %}
        <a href="/{{ post.categories | first }}/" class="tile__category">{{ category.name }}</a>
      {% endif %}
    </article>
  {% endfor %}
</div>
Related posts only appear if there are three or more matches based on post.tags.

Similar in design to the related posts module, I also utilize a set of tiles for featuring posts. Visually they look the same but instead of being dynamically determined by post.tags they’re manually set and grouped by category.
Adding featured posts
The first step is to flag a post as featured. To do this, I add featured: true to its YAML Front Matter.
Next I use a variation of the related posts include with additional Liquid conditionals to control headlines and other variable data.
<!-- /_includes/featured.html -->
<h3 class="tile__header">{% if page.feature.headline %}{{ page.feature.headline }}{% else %}Featured Posts{% endif %}</h3>
  <div class="tiles">
    {% assign features = site.categories[page.feature.category] | where:"featured", true %}
    {% for post in features limit:3 %}
      <article class="tile__item" itemscope itemtype="http://schema.org/CreativeWork">
        <meta itemprop="text" content="{{ post.excerpt | strip_html }}">
        <a href="{{ post.url }}">
          <img src="{% if post.image.teaser %}{{ post.image.teaser }}{% else %}{{ site.teaser }}{% endif %}" itemprop="image" alt="{{ post.title }}">
          <h3 class="tile__title" itemprop="headline">{{ post.title | markdownify | remove: '<p>' | remove: '</p>' }}</h3>
          {% assign readtime = post.content | strip_html | number_of_words | divided_by:site.words_per_minute %}
          <span class="tile__item-time">{% if readtime <= 1 %}1{% else %}{{ readtime }}{% endif %} min read</span>
        </a>
        {% if post.work %}
          <span class="tile__category">{{ post.work }}</span>
        {% endif %}
      </article>
    {% endfor %}
  </div>
To display on a page, the following YAML Front Matter is added — customizing the headline and assigning a site.categories category to pull from.
feature:
  visible: true
  headline: "Featured Tutorials"
  category: mastering-paper
Everything is pulled together by adding this to relevant layouts:
{% if page.feature.visible == true %}
  {% include featured.html %}
{% endif %}

Introducing flexibility
My configuration files used to be a dumping ground for all kinds of site, navigation, and author data. This always felt messy to me and when support for data files was added I took advantage of it in my Jekyll themes first.
Data files
So what exactly are data files? I like to think of them as custom variables that Liquid can play with in all the ways you’d expect — for loops, captures, filters, you name it. Data files can be YAML, JSON, or CSV, are placed in /_data/, and are accessible with site.data.<filename>6.
Easily editable navigation menus
Before discovering data files I was hard-coding nav links directly into my layouts and junking up _config.yml with them. It was with my first set of Jekyll themes that I began to see the benefit of pulling this data out into their own little world.
In an effort to build a DRY navigation menu for this site I created /_data/navigation.yml and added the following four links:
# masthead navigation links
masthead:
  - title: "About"
    url: /about/
  - title: "Work"
    url: /work/
  - title: "Blog"
    url: /articles/
  - title: "Mastering Paper"
    url: /mastering-paper/
As you can guess, title corresponds to the page title and url… well the URL. With these values, I can loop over the home-primary key and auto-generate list elements with the appropriate titles and links from a single file.
<!-- excerpt from /_includes/masthead.html -->
<header class="masthead">
<div class="container">
<a class="masthead__title" href="/">{{ site.title }}</a>
<nav id="nav-primary" class="masthead__menu-wrapper">
<ul class="masthead__menu">
<li><a href="/" class="masthead__menu-item">← Home</a></li>
{% for link in site.data.navigation.masthead %}
<li><a href="{{ link.url }}" class="masthead__menu-item">{{ link.title }}</a></li>
{% endfor %}
<li><a href="#0" class="overlay__menu-trigger masthead__menu-item" aria-label="Navigation Menu" title="Navigation Menu">• • •</a></li>
</ul>
</nav>
</div>
</header>
What’s going on here is I’m looping through site.data.navigation.masthead to pull out a title and url variable for each. If I ever need to update the masthead navigation I just edit navigation.yml and the rest is handled automatically at build.
To improve the navigation’s UI, .active classes are added using the following Liquid:
{% for link in site.data.navigation.masthead %}
<ul class="masthead__menu">
  {% assign class = nil %}
  {% if page.url contains link.url %}
    {% assign class = 'is--active' %}
  {% endif %}
  <li><a href="{{ link.url }}" class="masthead__menu-item {{ class }}">{{ link.title }}</a></li>
</ul>
{% endfor %}

I’ve also used a similar technique to build drop-down navigations with nested lists. An example of one of those is as follows.
Dropdown navigation data file
# example /_data/navigation.yml
- title: "About"
  href: "/about/"
  children:
    - childtitle: "Biography"
      childhref: "/about/bio/"
    - childtitle: "Resume"
      childhref: "/about/resume/"

- title: "Portfolio"
  href: "/portfolio/"
  children:
    - childtitle: "Design"
      childhref: "/portfolio/design/"
    - childtitle: "Illustration"
      childhref: "/portfolio/illustration/"
    - childtitle: "Development"
      childhref: "/portfolio/development/"
Dropdown navigation HTML and Liquid
<ul>
  {% for nav in site.data.navigation %}
    {% if nav.children != null %}
      <li><a href="{{ nav.href }}">{{ nav.title }}</a>
        <ul class="child">
        {% for child in nav.children %}
          <li><a href="{{ child.childhref }}">{{ child.childtitle }}</a></li>
        {% endfor %}
        </ul>
        {% else %}
      <li><a href="{{ nav.href }}">{{ nav.title }}</a>{% endif %}</li>
  {% endfor %}
</ul>
Which will produce the following HTML:
<ul>
  <li><a href="/about/">About</a>
    <ul class="child">
      <li><a href="/about/bio/">Biography</a></li>
      <li><a href="/about/resume/">Resume</a></li>
    </ul>
  </li>
  <li><a href="/portfolio/">Portfolio</a>
    <ul class="child">
      <li><a href="/portfolio/design/">Design</a></li>
      <li><a href="/portfolio/illustration/">Illustration</a></li>
      <li><a href="/portfolio/development/">Development</a></li>
    </ul>
  </li>
</ul>
Author overrides
Made Mistakes has always had a singular voice, so supporting multiple authors wasn’t really on my radar. But for some of my Jekyll themes the need arose and I added support for assigning authors with a data file.
To achieve this. a YAML file in created in the _data directory with all of the authors.
# /_data/authors.yml

billy_rick:
  name: Billy Rick
  web: http://
  email: [email protected]
  bio: "I am a very extravagant man."
  avatar: billy-rick-photo.jpg

cornelius_fiddlebone:
  name: Cornelius Fiddlebone
  email: [email protected]
  bio: "Jewel miner."
  avatar: cornelius-fiddlebone-photo.jpg
Then, to override the author on any given post or page, author: is added to its YAML Front Matter with a key that matches one in authors.yml. For example to assign Billy Rick as the author of a post I’d add author: billy_rick.
With a small layout addition, Liquid is used to assign Billy Rick’s info, replacing the default values. In cases where an author isn’t set {{ site.owner }} values in _config.yml are used instead.
{% if page.author %}
  {% assign author = site.data.authors[page.author] %}{% else %}{% assign author = site.owner %}
{% endif %}
{% if author.avatar contains 'http' %}
  <img src="{{ author.avatar }}" class="bio-photo" alt="{{ author.name }} bio photo"></a>
{% elsif author.avatar %}
  <img src="/assets/images/{{ author.avatar }}" alt="{{ author.name }} bio photo"></a>
{% endif %}
<h3 class="author-name">{{ author.name }}</h3>
{% if author.bio %}<p class="author-bio">{{ author.bio }}</p>{% endif %}
Slug names
This next one is probably overkill and inefficient in most scenarios, but for me, it has a use. The hacky way I’m going about creating breadcrumb navigations imposes some limitations on the crumb titles.
With Liquid I’m taking a page.url and then grabbing the first bit of text before /. Since I’m fairly consistent in how I organize posts (using categories as part of my path format) this works reliably. The problem I run into is some of these “slug” names aren’t all that descriptive or properly title cased.
By using a slugs.yml data file as a definition list I can replace these “simple slugs” with whatever I want.
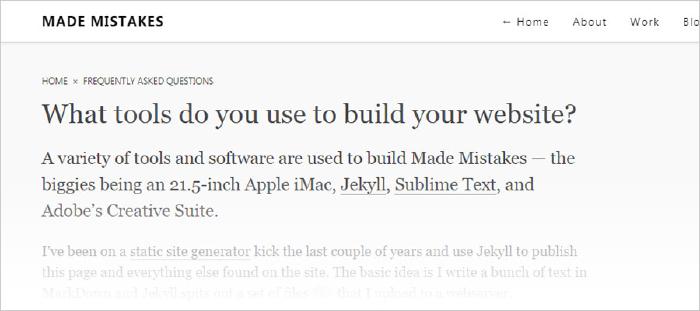
Let’s use the “What tools do you use to build your website?” FAQ page from my site as an example. If I were to output breadcrumbs for this page, I’d filter the page.url of https://mademistakes.com/faqs/website-tools/ down to faqs and end up with the following breadcrumbs: Home > faqs
Which isn’t the worst thing in the world, but ideally faqs would be properly capitalized (eg. FAQs) or spelled out as “Frequently Asked Questions.”
To fix this, I add a faqs slug to slugs.yml and assign it a nice descriptive name to use as the title — like “Frequently Asked Questions.”
faqs:
  name: "Frequently Asked Questions"
The breadcrumbs.html include is then modified to output a slug.name instead.
{% assign page_slug = page.url | remove_first: '/' | split: '/' %}
{% assign slug_first = page_slug[0] %}
{% assign slug = site.data.slugs[slug_first] %}

<nav class="breadcrumbs">
  <span itemscope itemtype="http://data-vocabulary.org/Breadcrumb">
    <a href="/" class="breadcrumb__item" itemprop="url">
      <span itemprop="title">Home</span>
    </a> <span class="breadcrumb__sep">×</span>
  </span>
  <span itemscope itemtype="http://data-vocabulary.org/Breadcrumb">
    <a href="/{{ page_slug[0] }}/" class="breadcrumb__item" itemprop="url">
      <span itemprop="title">{{ slug.name }}</span>
    </a>
  </span>
</nav>
Translation keys
Localizing my themes is an idea I’ve only started to flirt with. The thought of using data files as translation keys for localizing text was brought to my attention through a pull request by @yonojoy. This is by no means a full-on i18n solution, but it does help theme developers looking to support multiple languages.
There’s three pieces to pulling this off.
1. Languages data file
In the case of my Skinny Bones starter theme, German and French translations have been added via hashes in a YAML file (eg. /_data/languages.yml).
locales:
# English ---------------------------------------------
en: &DEFAULT_EN
overview: "Overview"
toc: "Table of Contents"
written_by: "Written by"
updated: "Updated"
share: "Share on"
en_US:
<<: *DEFAULT_EN # use en for en_US
en_UK:
<<: *DEFAULT_EN # use en for en_UK
# German translations ---------------------------------
de: &DEFAULT_DE
<<: *DEFAULT_EN # load English values as default
overview: "Übersicht"
toc: "Inhalt"
written_by: "Verfasst von"
updated: "Zuletzt aktualisiert:"
share: ""
de_DE:
<<: *DEFAULT_DE # use de translation for de_DE
# French translations ---------------------------------
fr: &DEFAULT_FR
<<: *DEFAULT_EN # load English values as default
overview: "Aperçu"
toc: "Table des matières"
written_by: "Écrit par"
updated: "Mis à jour"
share: "Partager sur"
fr_FR:
<<: *DEFAULT_FR # use fr translation for fr_FR
2. Set locale in Jekyll config
To change the default language, a locale variable is set in _config.yml. For example to switch from English to French you’d add locale: fr_FR or locale: fr.
3. Call in the correct language hashes
The last step is using long variables like {{ site.data.languages.locales[site.locale].updated }} into the appropriate places — replacing any text you want to localize. If done correctly, this variable should output with the French updated string, Mis à jour.
If you want to learn more about this technique be sure to check out Tuan Anh’s blog post. Or if you’re looking for a plugin to do the heavy lifting, Jekyll-Multiple-Languages might be a good place to start.
Maybe not 100% complete, but this is certainly the majority of techniques I’ve picked up using Jekyll over the years. What keeps me coming back is its flexibility — there’s no shortage of ways to approach a problem and always new things to learn. Browse the threads on Jekyll Talk on any given day and you’ll see what I mean.
Kramdown is a Markdown converter that supports features currently unavailable in plain Markdown. Things like automatically generating a table of contents from headlines, special attributes, and more. ↩︎
jekyll-tagging-related_posts - replaces Jekyll’s
related_postsfunction to use tags to calculate better post relationships. ↩︎The profiler can be enabled with the
--profileflag (eg.jekyll build --profile). ↩︎Less is a CSS pre-processor, meaning that it extends the CSS language, adding features that allow variables, mixins, functions to make it more maintainable. ↩︎
Output the source of an asset using
asset_sourceJekyll-Assets tag. Example:{% asset_source critical.css %}↩︎Example: Data file
/_data/foo.ymlis accessible viasite.data.foo. ↩︎
35 comments
Man, you are truly a treasure in the Jekyll world and more people should follow in your footsteps… to learn and to further leverage the possibilities of Jekyll. For me inspiration to redesign and recode my sites… probably with Skinny Bones. Thanks for all your efforts and mostly for the detail and passion that is always found in your code.
Thanks sir! Just trying to return the sentiments I’ve picked up from others in the Jekyll and the open source communities.
Thanks for the awesome write-up! I used your themes as reference a lot when I was creating my own - yours were (and still are) some of the most complete and best documented out there.
Regarding images, I use a slightly customized version of the jekyll-minimagick plugin to automatically generate multiple sizes of my images (thumb & small) for my webcomic theme. It sounds like it would do most of what you want."
You just made me to understand that I had to learn a lot in order to use Jekyll on all its power. Thanks
I’ve found there isn’t much to learn with Jekyll per say as there is with keeping up with modern web development tooling and trends.
Since Jekyll does a good job of getting out of your way it leaves you with a blank canvas to do whatever you want in terms of markup, styling, scripting, etc. That’s were the real learning takes place.
Really enjoy your comprehensive Jekyll posts. I am very much looking forward to an updated styleguide using atomic design :).
Lots of info in one post. Great job.
Learned a lot. Thanks~
Great post thank you!
This is such a great resource, thanks for the thorough post!
Long and good article. Would you write something like a guide (more concise) how you setup jekyll and configure it the way you use it?
Very useful article. Been using Jekyll for a couple of months now. I’m already using a number of the suggestions here such as the
compress.htmllayout. The liquid template profiling looks like it would be a great help.On my own site I’ve implemented client based search functionality to avoid using a service such as Google Custom Search.
I really enjoyed reading your post, it has brought up issues that I should address earlier rather than later. I still have some time as I currently have only about 64 blog posts and takes about 2 seconds to generate. So, it is nowhere near the amount of posts (and build time) as yours.
The idea of the You May Also Enjoy module to provide readers with related content sounds great. And also featured posts. I’ll be sure to add and try them out. Hopefully they won’t slow the build times too much…
The point about having multiple
index.htmlfor different pages is spot-on, as I am someone who currently has that haha. It gets annoying pretty fast and will be taking your advice on using a_pages/directory to store those pages.I’m also looking into bumping my page speed from 67/100 to hopefully, 90s or high 90s such as yours.
Also didn’t know about
_data/, so similar to what you said, I was dumping most of my data into my config file… I suppose I haven’t been utilizing YAML to its full extent. I have head, header, footer, foot HTML template files, but I feel your approach to using Liquid templates iterating through data objects would not only scale much nicer but feel more robust.Once again, thank you for all the great tips and I look forward to reading more of your posts!
@Derek - The biggest impact on optimizing page speed for me was serving images responsibly and responsively where I could. That and making sure CSS and JS weren’t blocking the rendering of each page, which meant inlining the critical bits into the
<head>element and using loadCSS to async the rest.2 seconds isn’t bad at all for a build time. If you do see things slowing down here’s a couple of bottlenecks I’ve discovered with large Jekyll sites:
forloops. Try to limit them as they can really slow things down._sitefolder on each build. I’ve started using Gulp to do the copying and caching for me to avoid moving 1GB of images each build, which helped speed up things considerably.lsienabled, while useful in displaying relevant content to improve user engagement, has a high cost on build times.I did some rough build tests to get an idea of what was slowing things down for me. They’re not all that scientific (ran each 3 times and averaged), but might give you some ideas if you’re curious. The operating system and build of your computer also factor in. Found that macOS with an SSD performed slightly faster than a Windows PC with SSD.
wow, thank you. learned a few new tricks
Many many thanks
This article is really a “goldmine”, I learn a ton of new things I now have to try ;-)
Kindest regards, From France, Rudy
Thank you for this article, I’m waiting for the 2017 version ;)
Stay tuned, the 2017 version is going to go a little something like Gulp + Jekyll + Travis CI = testing and auto deploy nirvana.
hey michael, is your “Overview”-menu based on javascript? Or maybe you have a(n) reference/article about it?
ps: just started, but is going to be filled with static data soon: www.bastogrande.de
It’s pure CSS using the “checkbox hack.”
Thanks for great article. It helps a lot.
The problem as I see it is that when Jekyll started - you could simply install it on any OS and create some markdown and have your website.
99.999% of what you’ve described on this page goes deeeeep into internals and configurations and stuff which are utterly undocumented and not for anyone who hasn’t spent the past decade doing complex web development.
Jekyll really has shot itself in the foot with this stuff.
I agree a good chunk of this is really taking a deep dive into web development territory (asset management, critical path CSS, etc.), but you can’t blame Jekyll for that. It makes absolutely no claims to support or do any of that out of the box. If anything it’s a testament to its flexibility that it can be used in whatever way you want.
In the end Jekyll still takes your Markdown files and spits out
.htmlfiles, nothing has changed there. About the only thing not really documented is the whole_pagesthing. But the liquid profiler, collections,_datafiles, etc. all are if you take the time to dig into the documentation. I don’t think it’s fair to expect Jekyll to prescribe every way you can use these to build a site or app.The way I’m using these features isn’t necessarily how you or anyone else might want to. It’s completely optional, which is one of the reasons I keep coming back to Jekyll to solve problems. It’s not just a blog generator…
So, is this site run on Jekyll too?
It’s 2017 now and I’ve been using Jekyll heavily for quite some time and using gulp (I even did some builds with webpack) but I’m really excited to see your deployment write-up and Travis CI.
Recently deployed with this method and it worked but it basically caused a -rm -rf to my entire server because I fired my script at $HOME and that was a very bad day, so make sure you are specific when guiding people in these steps hah.
Until I get the time to write things up officially take a look at my Gulp tasks. They do all of the heavy lifting.
I basically use Travis CI to fire up Gulp to build the site, once that finishes it starts a deploy Gulp task which uses gulp-rsync to transfer everything.
There’s a whole mess of options which you can set. You have to specifically use the
--deleteflag if you want to delete extraneous files from destination dirs. Which is nice since it gets around the issue you encountered above. It also has--dry-runwhich is good for testing.Thanks so much for posting this! I am starting jekyll and this is so useful
Your documentation of Minimal Mistakes is awesome - thank you! Ditto for all your blog posts here.
Question - I’m looking into how to similarly install a comment counter at the top of posts. Do you have any blog posts or issues/PRs documenting more detail about how you’ve done that?
No posts about how I’m doing it, but it’s pretty easy to do if you’re using Staticman to power your site’s comments.
Because all my comments are stored in
.ymlfiles in the_datafolder you can use the Liquidsizearray filter to determine how many comments are in a particular post.If you examine the source of my site you’ll see this line which does just this:
On post listings that loop over
site.postsI modify it slightly to pull inpost.sluginstead ofpage.slugso it can grab the correct set of comments to count.