Mastering Pencil by FiftyThree
Not convinced you need FiftyThree’s Pencil stylus in your life? Or maybe you just want to level-up your digital drawing skills?
With the following tutorials, I reveal all of my techniques for using Surface Pressure and Blend in the iPad app, Paper. Turning you into a Pencil stylus master in no time!
What makes Pencil so unique and special?
Pencil by FiftyThree is not like other styli designed to work with Apple’s iPad tablet. Pencil’s unique shape and meticulously crafted finishes (Walnut, Graphite, and Gold) are the obvious differentiators, but it’s the experiential qualities that truly sets it apart from the rest.
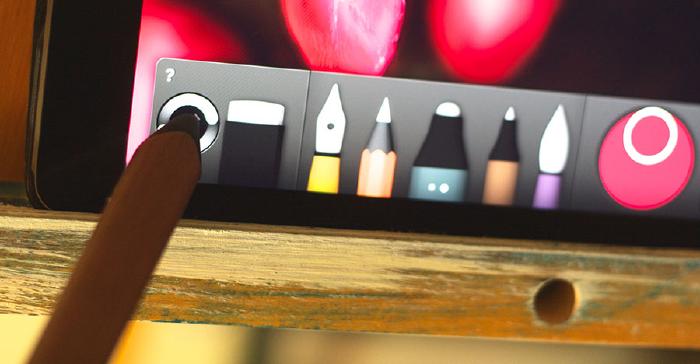
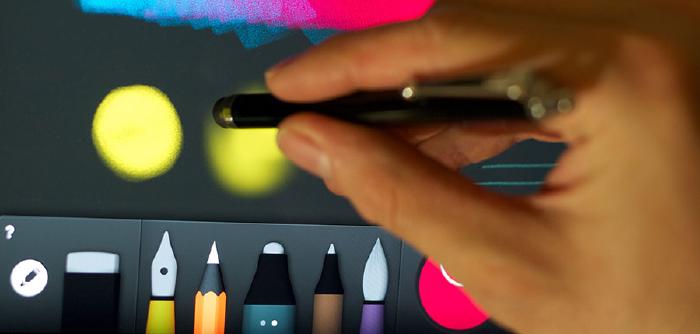
For the uninitiated, Pencil allows you to switch between tools in an intuitive and natural way when working with Paper (and apps that support FiftyThree’s SDK). Bounce between drawing, erasing, and blending without ever having to “switch tools” — the tip draws, the eraser erases, and your finger smudges.
Switching between modes of working is a breeze with Pencil.
Paper’s tools have a level of expressiveness that I’ve yet to see matched by other iPad apps. Pencil augments each of them with improved accuracy, finer controls, and a sort of intelligence that reduces unwanted marks — allowing you to rest your wrists on the screen as you work.
A different kind of tip
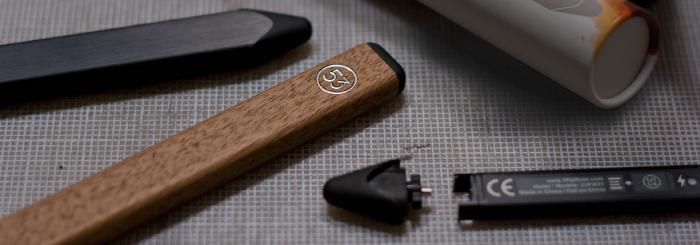
Pencil’s wedge shaped tip is covered in a rubbery material like many other iPad styli, but unlike these “dumb” capacitive siblings, Pencil’s is much smarter. Using a combination of hardware + software wizardry, strokes become more expressive depending on their speed, direction, and alignment to the iPad’s screen.
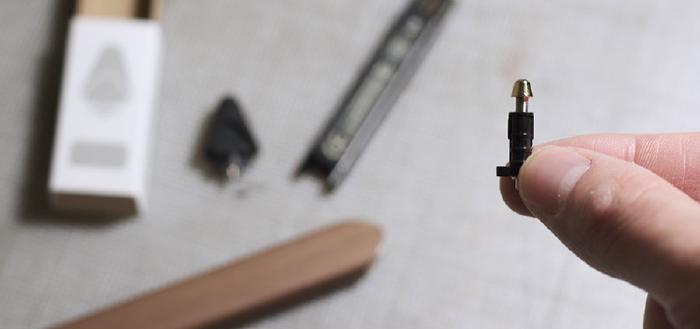
Thin lines are made with Pencil’s fine point while wider ones are made with angled edge of the tip. No other stylus I know of has this ability, making Pencil feel less like a digital tool and more like a real piece of charcoal or graphite (without the mess of course). Oh, and in case you were wondering, the tip is user replaceable too.
A built-in eraser
What would a pencil be without an eraser? Well FiftyThree’s Pencil has one of those too. When you want to erase something you just flip Pencil on its head and glide the rubbery edge over the mistake to remove it.
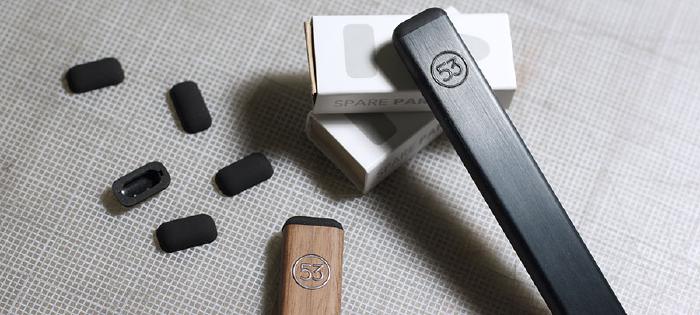
Size can be controlled by making contact with the eraser’s corner (for small mistakes) or the entire surface to remove a larger area. Just like the tip the eraser is replaceable, though I haven’t needed to replace mine yet.
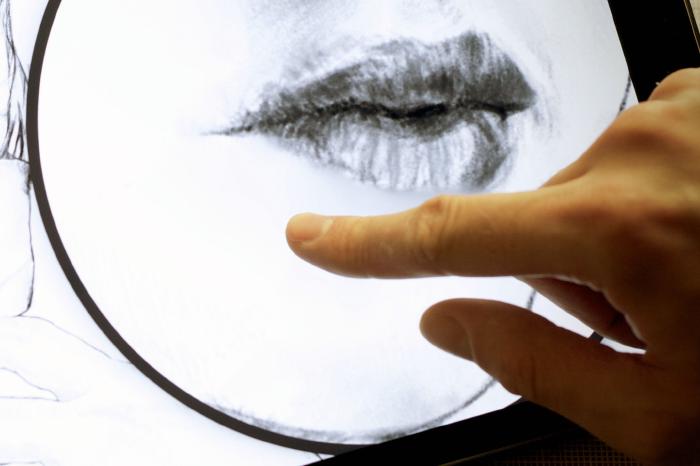
Palm rejection
I’m going to come right out and say it.
Drawing, painting, and writing digitally on the iPad’s glass surface feels really weird.
Thankfully FiftyThree put the engineering effort into Paper and Pencil to alleviate these issues — specifically related to palm rejection.
When Pencil is connected to Paper (or supporting apps), Palm Rejection completely transforms the drawing experience making it more accessible.
Registering touches consistently is almost impossible for my two little girls at this age because:
- The iPad is easily confused by touches made by resting wrists and palms on the screen.
- Their small fingers are often ignored by the iPad’s sensors.
Pencil makes coloring on the iPad a reality for my easily frustrated daughters without fanfare or setup — Palm Rejection just works.
Setting up Pencil
There’s not much you need to do before using Pencil. Upon opening the box and removing the plastic wrap you’ll want to slide out the tip to charge the battery via USB. In about 90 minutes you’ll be good to connect it with Paper (or any Pencil ready app) by pressing the tip to the pairing spot.
To view more details about your Pencil (battery level, firmware, serial number) tap the FiftyThree logo (or your profile icon when signed into Mix) located in the upper right corner.
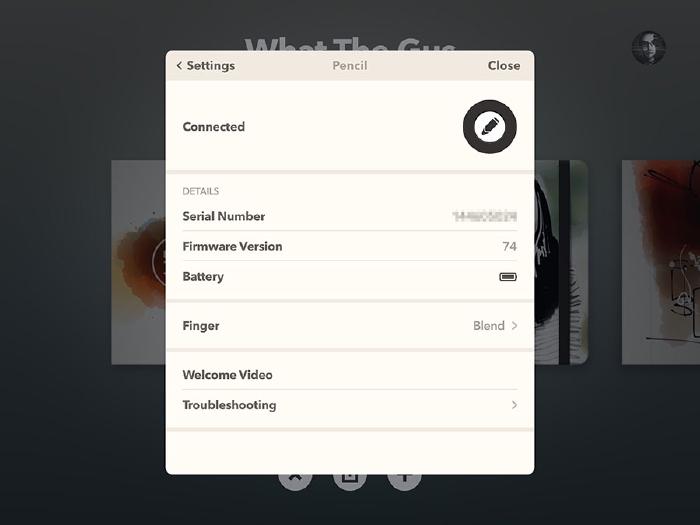
For even more information on how to setup Pencil, change tips, and performing maintenance like updating the firmware — check out FiftyThree’s Support pages. It’s where I first learned about this little fix:
If you have Multitasking Gestures or Accessibility Zoom enabled, this will prevent Pencil from operating effectively. Turn off Multitasking Gestures in your iPad Settings, under General. Turn off Accessibility Zoom under General / Accessibility.
support.fiftythree.com
Surface Pressure, what’s that?
When Pencil is connected to Paper it gains enhanced control and expressiveness over the tools with a feature FiftyThree calls Surface Pressure. Stroke sizes become directly related to how much or how little Pencil’s tips touch the screen.
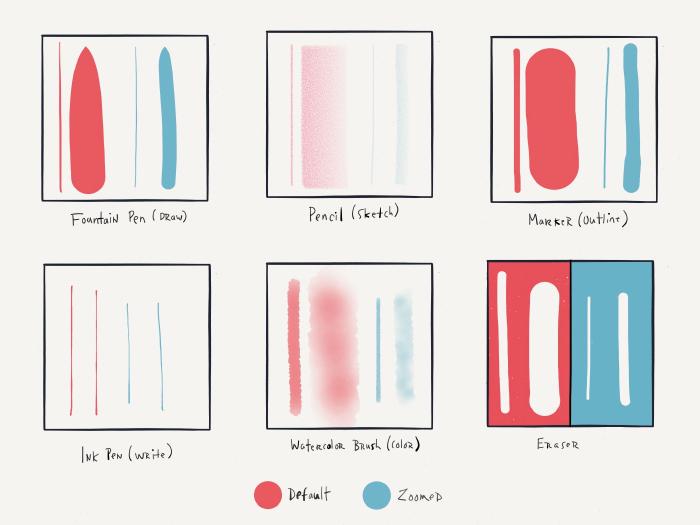
Curious on the range you can achieve with Surface Pressure enhanced tools?
If you ask me, Surface Pressure is Pencil’s killer feature. It has completely transformed how I interact with Paper by allowing me to be more loose with drawing. What does that mean exactly? Well let me show you…
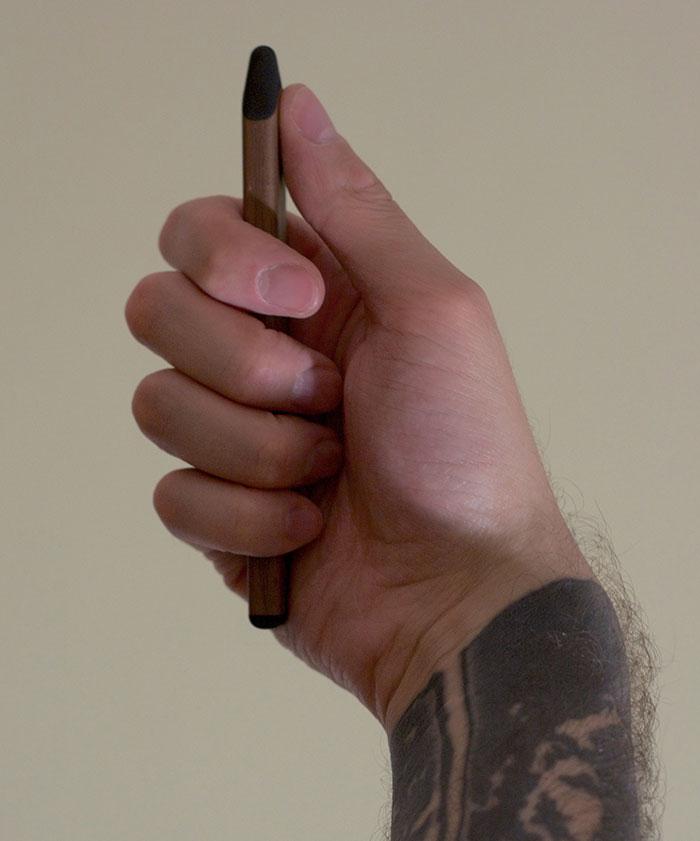
By design Pencil’s invites you to hold it differently
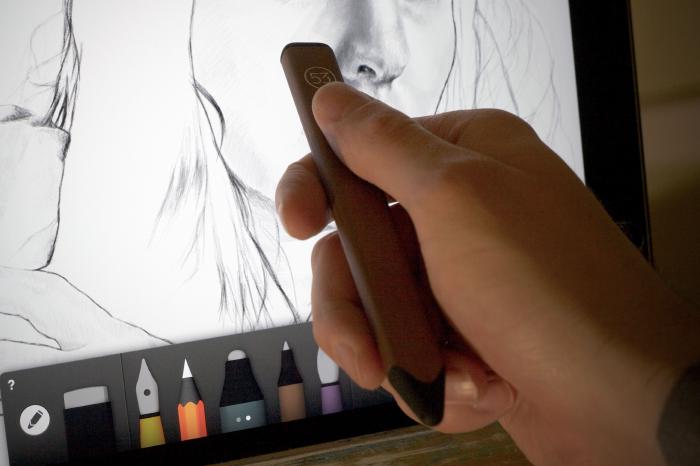
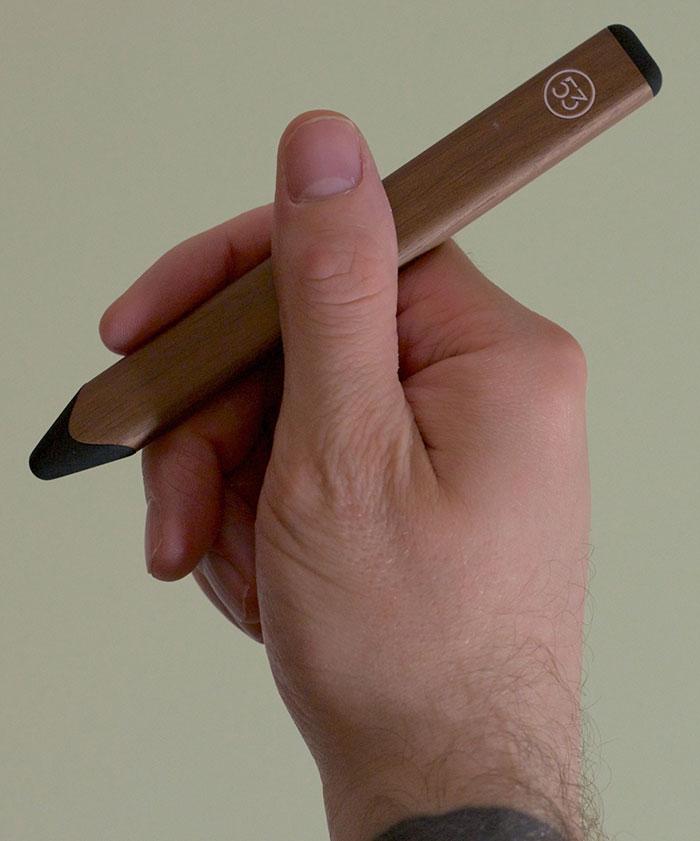
To get the most out of Surface Pressure you’ll want to practice holding it with different grips.
I like to hold Pencil as if it’s a piece of charcoal and utilize the angled tip when sketching. Not only does this change the characteristics of pencil strokes (I’ll get to that in a minute), but it also encourages you to use your entire arm instead of the wrist.
Sketching in this way is more fun serves and serves practical reasons as well. By moving your entire arm you’ll find that:
- Drawing straight lines and ovals becomes much easier.
- You can create sensitive lines1 at will.
- Your drawings will have more movement and energy to them.
- It becomes quicker to fill in large areas of space.
A new tool for shading
You may have noticed in the cheat sheet above (or in your own experiments), that the sketch tool takes on new qualities with Surface Pressure. With this tool selected, the angled edge of Pencil’s tip turn into wide textured strokes that resembles those made with charcoal or graphite.
Wide strokes made with the pencil tool overlap differently than the ink, marker, and brush tools. These “shade” strokes have a more defined edge and can cause color banding2 in tones if not smoothed out. To better illustrate this concept here’s what I consider a tone with “blocky” strokes.
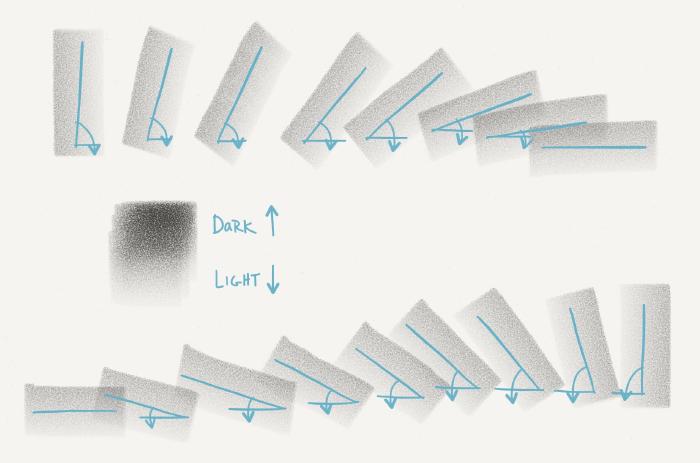
If you look closely at the wide strokes of the pencil (sketch) tool, you’ll notice it fades from dark to light.
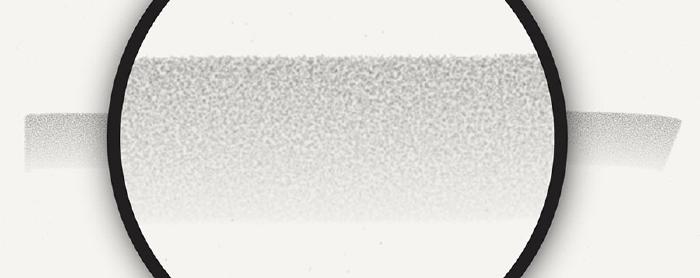
In my tests, it seems as if the placement of the darker edge is determined by the angle of the stroke. Dark points up and light points down. I’ve yet to find a way to reverse that, so it’s worth keeping that in the back of your mind when shading horizontally.
What’s Surface Pressure good for?
Now that you know what Surface Pressure is and how it works. I thought it would be useful to show off what you can do with it in Paper by FifyThree.
Gesture drawing and other warm-ups
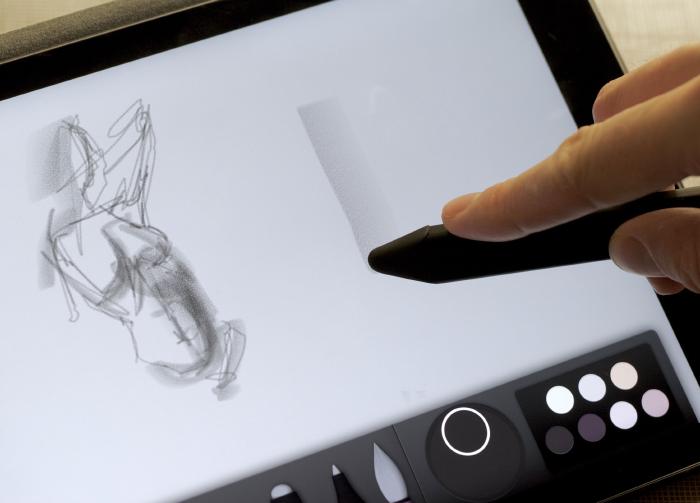
A great way to warm-up before doing any sort of serious drawing is with quick gesture sketches. In art school we’d start each class capturing a model’s movement in a series of 2 minute poses with charcoal and conté crayons.
When drawing with Pencil and the sketch tool you can get a look that resembles charcoal rubbed onto paper. Even better, by working digitally you avoid any of the mess from handling a stick of charcoal.
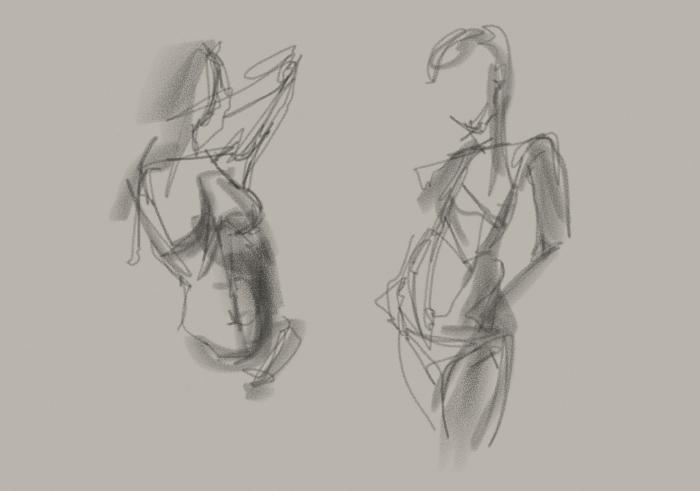
Examples of gesture drawings created with Pencil and Surface Pressure:
To get the most out of this technique you’re going to want to hold Pencil differently than you’re accustomed to. Instead of a tripod grip you’ll want to wrap your fingers around Pencil and rest your thumb just below (or on) the tip.
As you sketch and draw with this palm grip you’ll need to get comfortable with both pushing and pulling your strokes. Your entire arm and wrist should be moving — wrist only movements will lack fluidity. To better illustrate what I mean here’s a video of me drawing with the palm grip.
Another great way to loosen up your arm and hand is to draw ovals over and over again. Focus on moving your entire arm in a circular motion directly above the iPad’s screen.
If you take a close look above you’ll notice I make practice strokes in the air above the iPad’s screen before making contact with the Pencil’s tip. This helps achieve accurate and crisp lines without constantly rewinding mistakes.
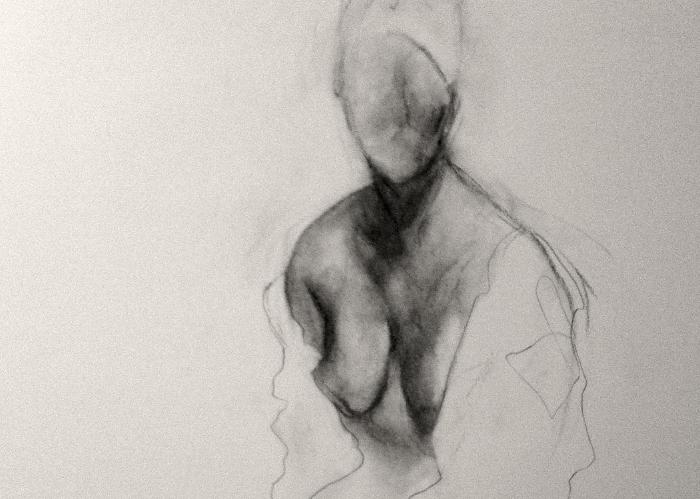
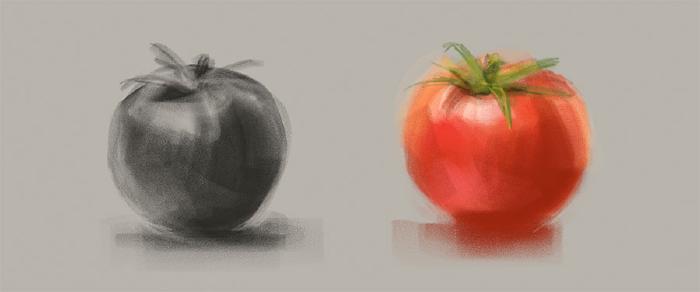
Shading and tone building
The same layering principles used when glazing can be applied to the pencil tool with Surface Pressure.
Surface Pressure enabled shading does most of the hard work by automatically making marks that fade into the canvas. If you’ve had trouble painting smoothly with the watercolor brush before, give the sketch tool a try — it’s way more forgiving.

Remember, each pass with Pencil’s angled tip leaves a noticeable edge when overlapped — use this to your advantage! By being deliberate in the direction of your strokes you will help define and reinforce the form of an object. Sort of like how hatching works, but with fatter strokes.
By curving my strokes around the contour of the tomato I let Pencil and Surface Pressure do all the work.
Blend, the smudge tool
As you might have guessed from the above heading, Blend lets you smudge stuff. This feature is only available to Paper when Pencil is connected, so you’ll want to pick one up to partake in blending fun. Trust me it’s totally worth it!
How does blending work in Paper?
It’s not a tool you select like the others, triggering it is way more intuitive than that. You use your finger to smudge whatever it is you want to blend or blur. And like most of Paper’s tools it reacts to the speed of your movement allowing dynamic control on the fly.
How does blending work in other apps?
Apps that support FiftyThree’s SDK (like Procreate) get some special abilities when connecting Pencil to them. In Procreate for example, your finger will activate the Smudge tool so you can freely switch between it and the Paint tool.
Paper and Blend settings
In case you skimmed through the first half of this article where I covered Pencil’s settings panel in Paper, here’s the important part to gleam.
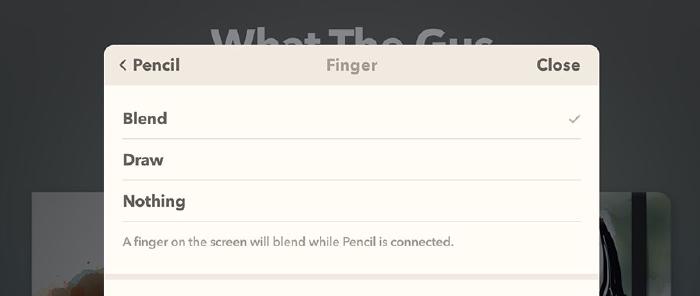
Paper is good about distinguishing between the tip of Pencil and your finger to avoid unwanted blends. But if you have a lighter touch when drawing you might find that you trigger it more than you’d like. In this case I suggest flipping between Blend and Nothing to toggle it on/off when needed.
What’s Blend good for?
When used in moderation smudging and blurring your drawings can take them to the next level. If you thought Surface Pressure was cool wait till you see what’s possible with Blend.
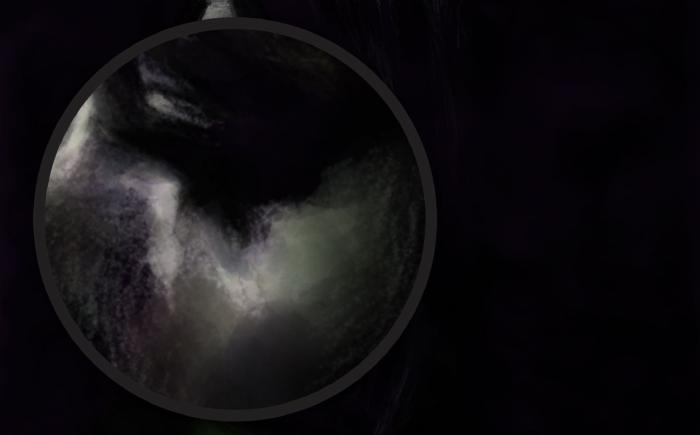
Depth of field and “bokeh” effects
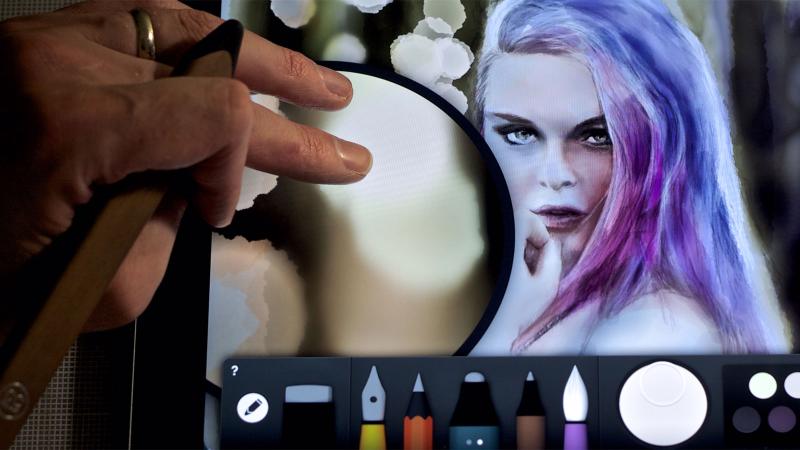
The first thing I did when experimenting with Pencil was to smudge up the background of a portrait I drew of my wife. Before Blend I was using the watercolor brush to dab blotches of white to simulate a bokeh3 effect.
By rubbing my finger across the background in a circular motion I was able to drop it out-of-focus, creating a more realistic bokeh.
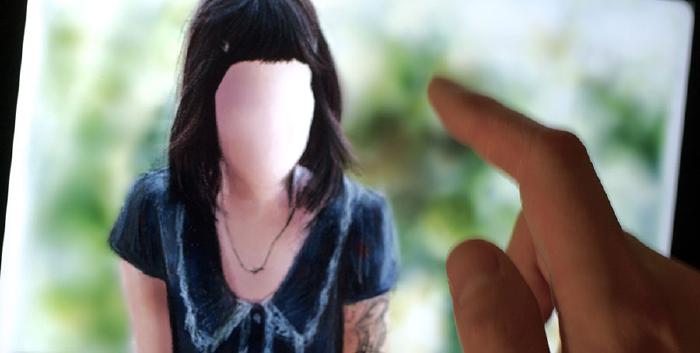
As you blend the background pay careful attention not to cut too far into the foreground. It’s this contrast between sharp and blurry that will ultimately help sell the effect by creating depth in the piece.
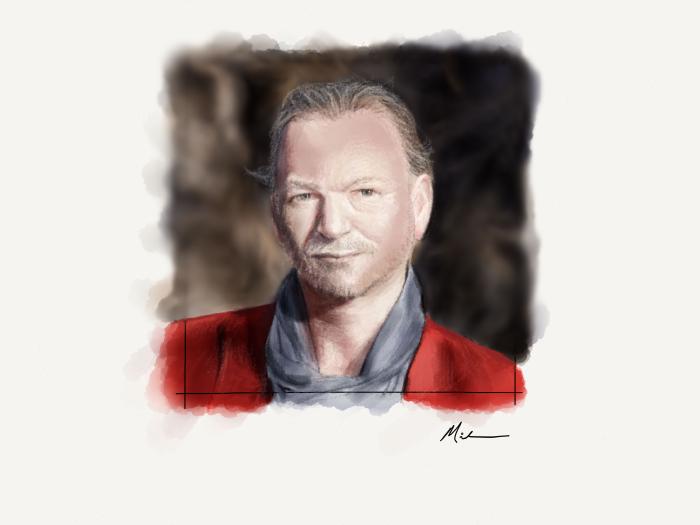
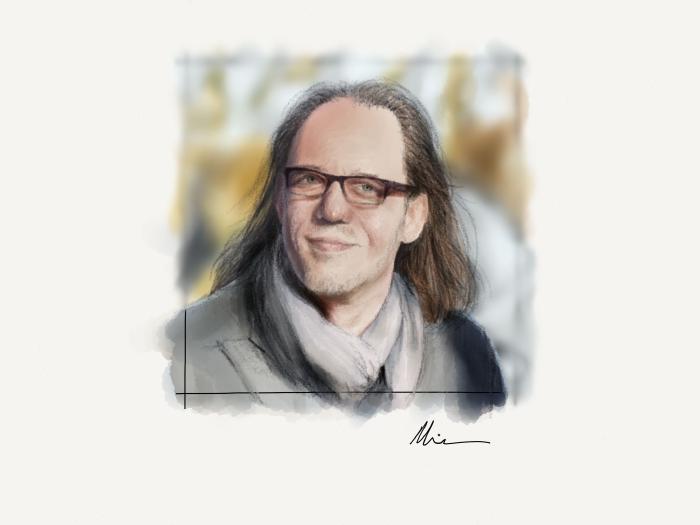
More blurred backgrounds
Here’s a few Paper portraits I used Pencil and Blend to draw. In the second drawing I purposely smudged the figure’s hand instead of the background to mix things up. Have fun and experiment with focal points!

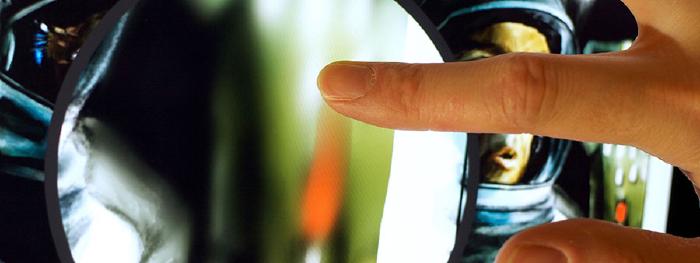
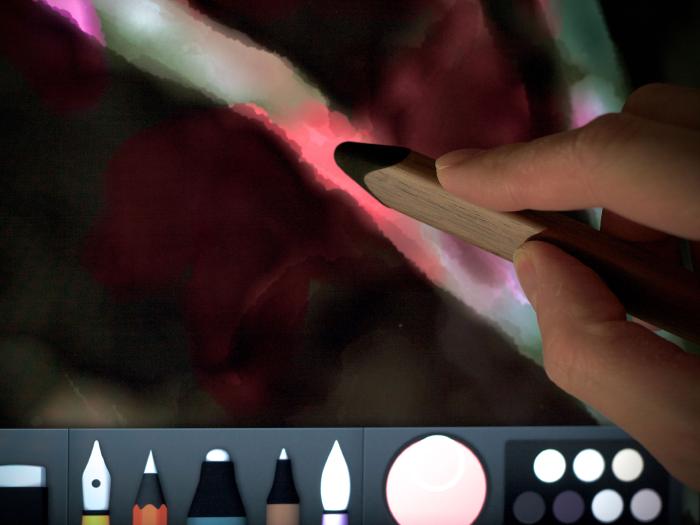
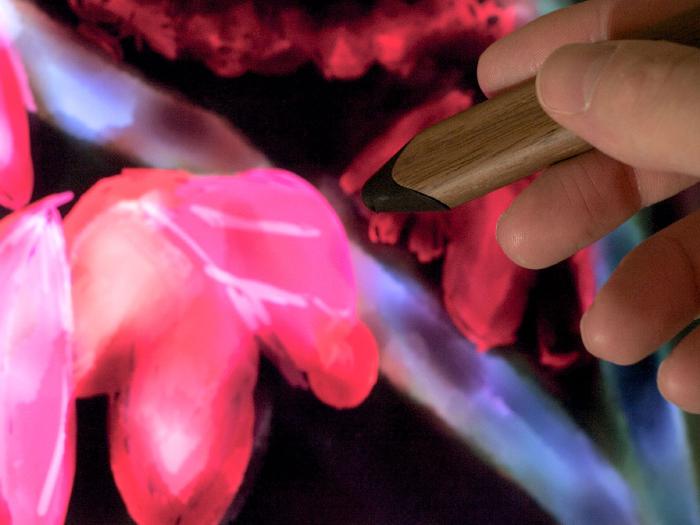
This technique of blurring the background doesn’t have to be used with just portraiture. In the following example it can be used to simulate macro photography, focusing on one object and throwing the rest out of focus.
The process is the same:
- Start by blocking out the background with the watercolor brush.
- Refine shapes and drop in color using the fountain pen.
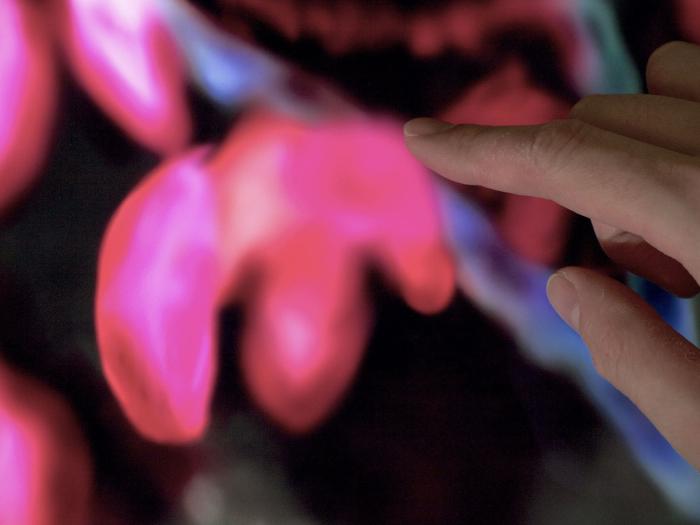
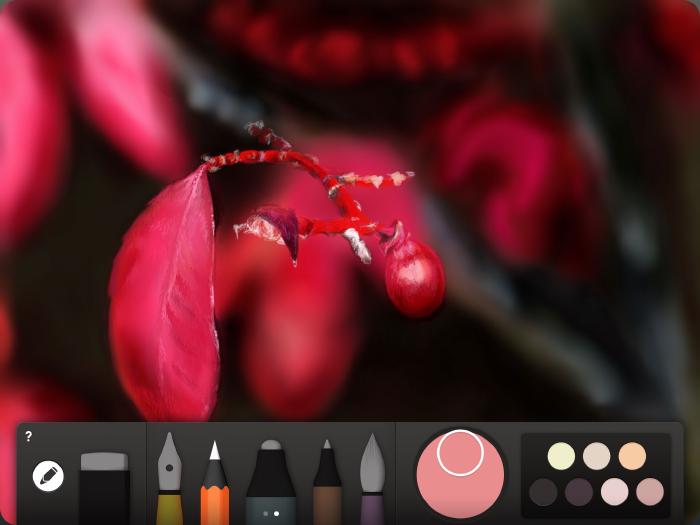
- Evenly blend the objects you want to appear out-of-focus (in this case the entire background).
- Draw the “in-focus” object leaving sharp edges and adding highlights and other details to make the illusion more convincing.
Reflections
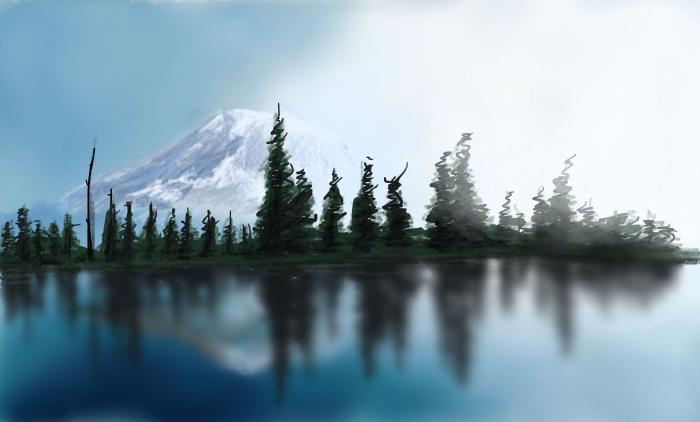
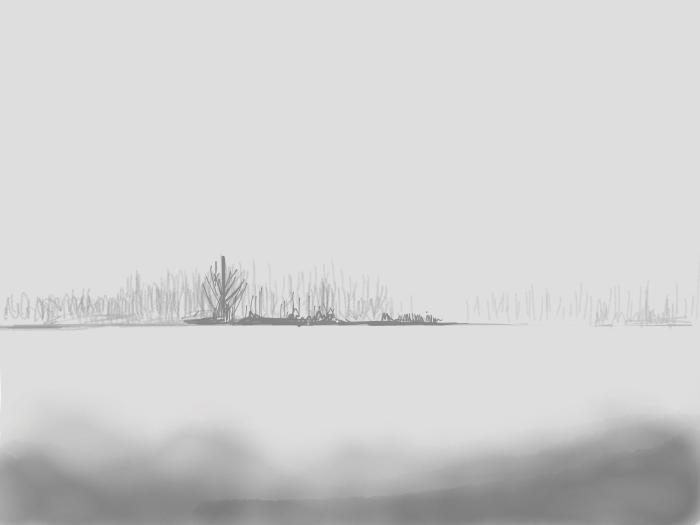
Ah reflections… they’re so magical and easy to achieve with Blend. With a few minutes of quick drawing and a couple of swipes of your finger you can create photo realistic scenes like these:
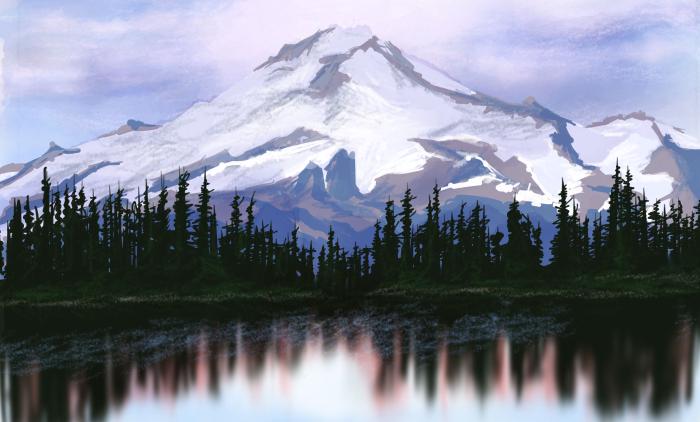
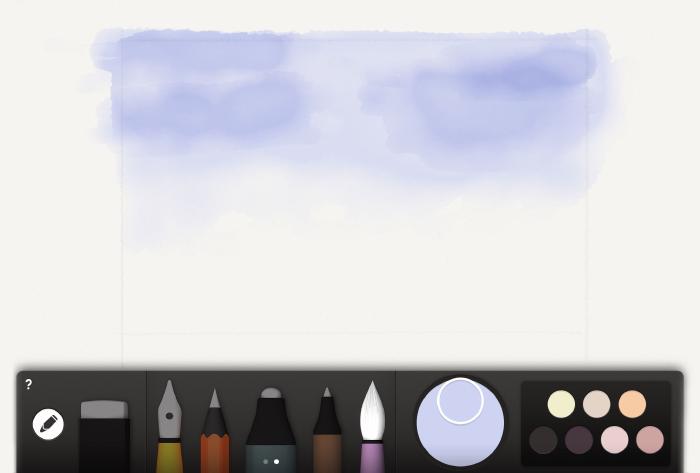
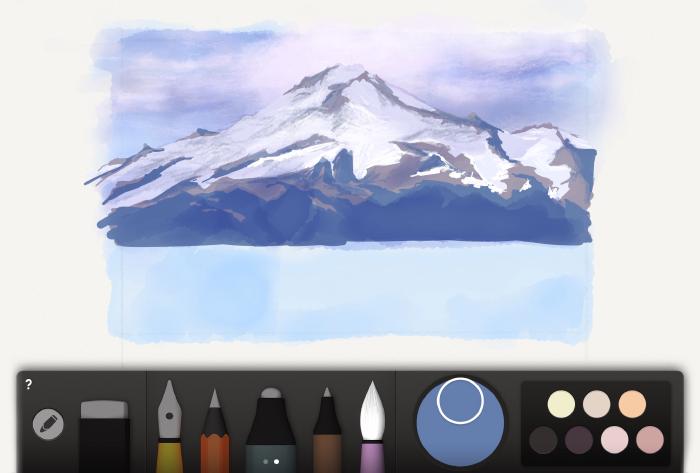
To start you’ll want to use the pencil tool to mark the horizon, and sketch out your scene — I like to use a light gray color for that. Then start to paint in the sky and shape the mountains using the brush and fountain pen tools.

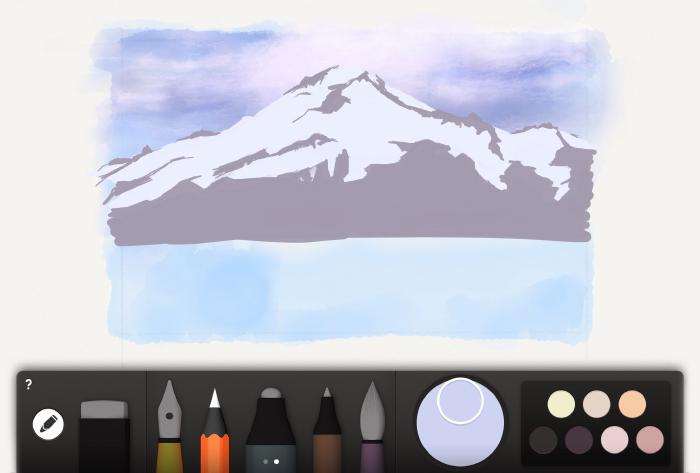
Adding snowy details to the mountains is next, followed by inking in a row of trees. If you’re looking for help with drawing foliage and other greens be sure to check out my Mastering Paper: Drawing Trees and Grass tutorial.
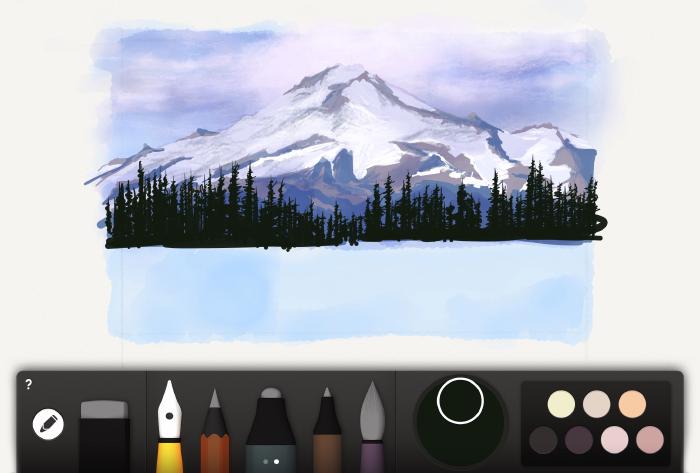
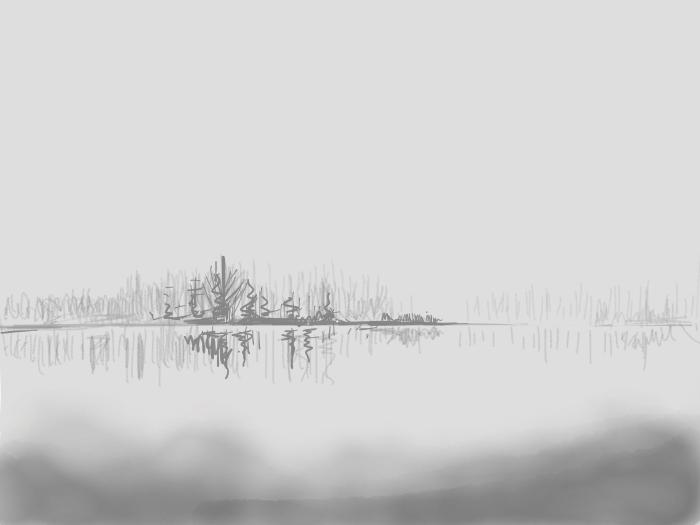
Spend most of your effort perfecting the top half of the scene. Once you’re happy with it we’re going to create its mirror image. Select the fountain pen tool and roughly draw everything again — in the bottom half and flipped upside down.
It doesn’t have to be perfect, you just want to match the colors and general shape of each object — the most important ones being the trees.
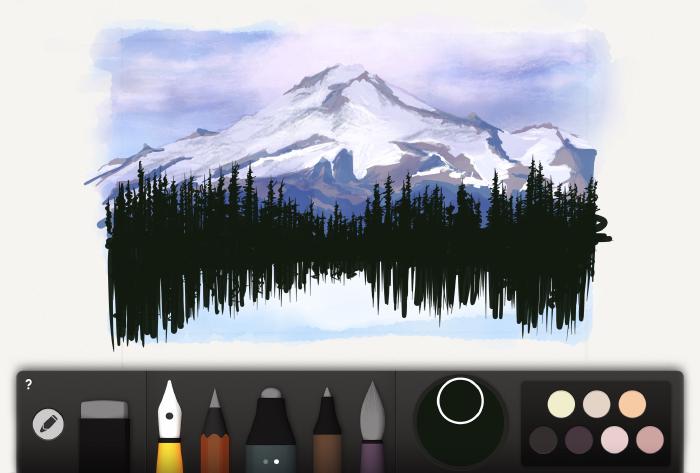
Now the fun part. Make sure Pencil is connected, Blend is turned on, and begin smudging everything from the horizon line down. At first, move fast to create a soft blur. Then gradually begin pulling trees into the water by dragging your finger slower.
To finish things off, select the pencil tool to sketch in waves, foam, and other details. Feel free to redraw any trees and shoreline you may have mistakenly blended when creating the water reflections.
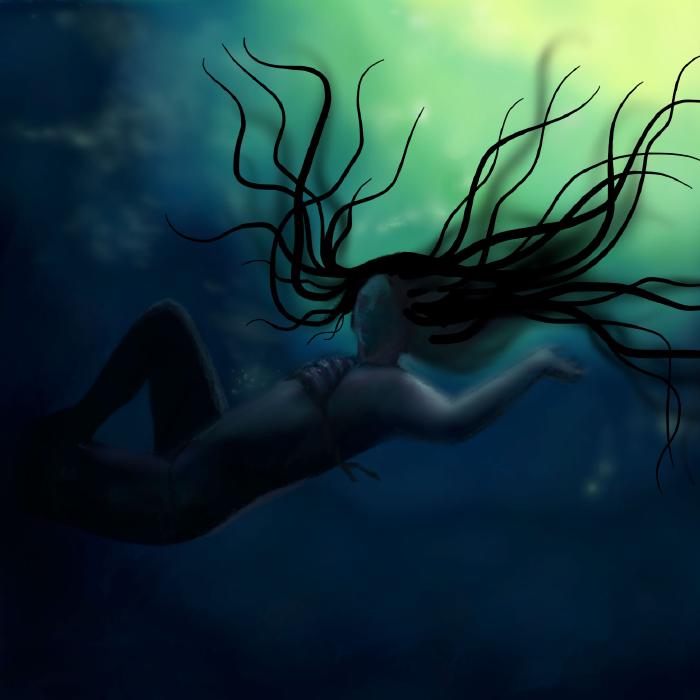
Underwater and dreamy scenes
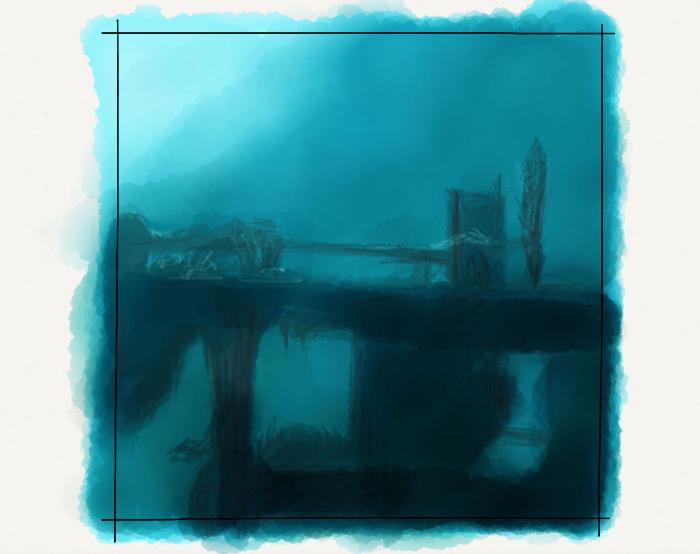
The same process for creating reflections can be used to paint beautiful underwater scenes as well.
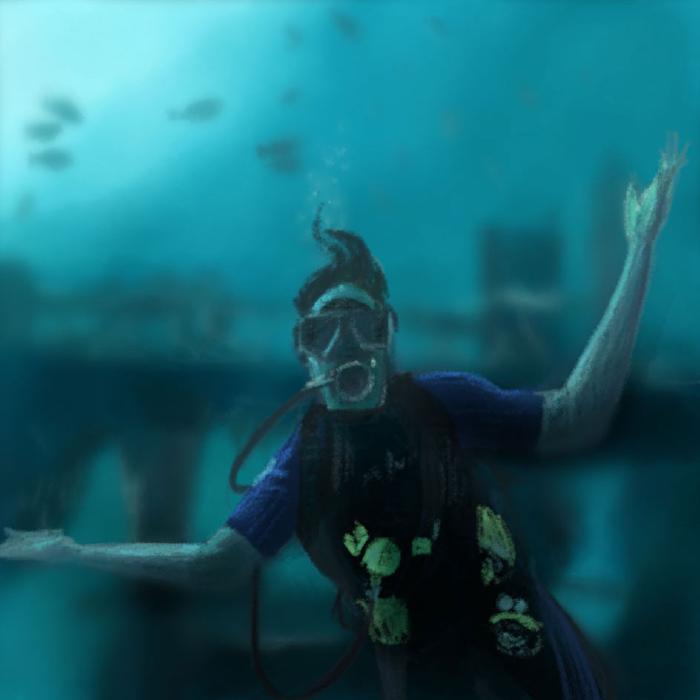
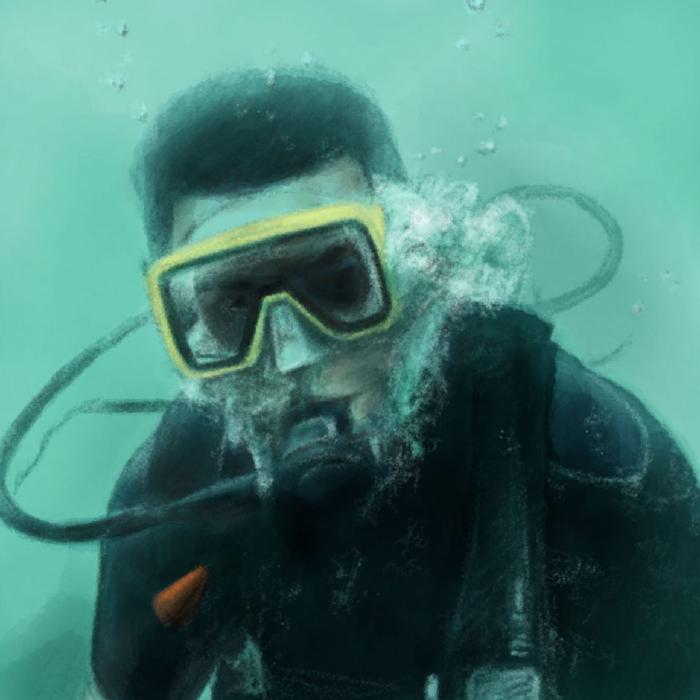
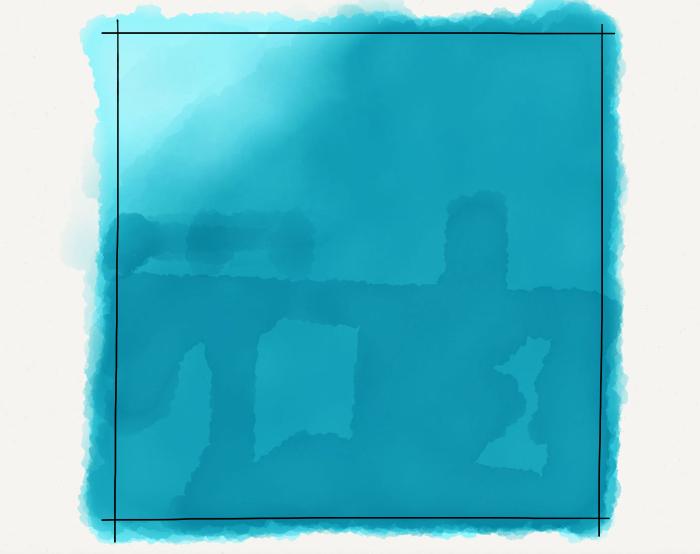
Similar to the reflection effect, you’ll want to determine what will be in and out of focus. In this case everything behind the scuba diver will be blurry so that’s what we will paint first.
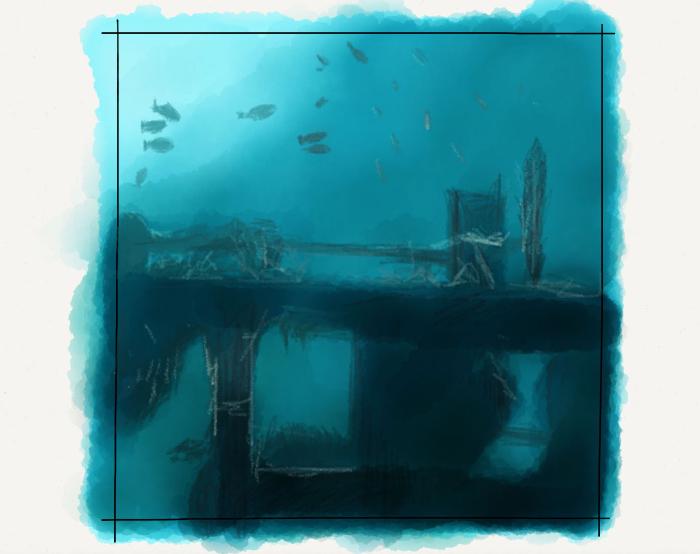
Using the watercolor brush you’ll want to lay down a base color and then start layering objects on top of that. Feel free to use the pencil, ink pens, or marker tools to draw the rest of the background.
Don’t worry about adding too many details at this point, we’re going to smudge most of the scene away in a minute…"
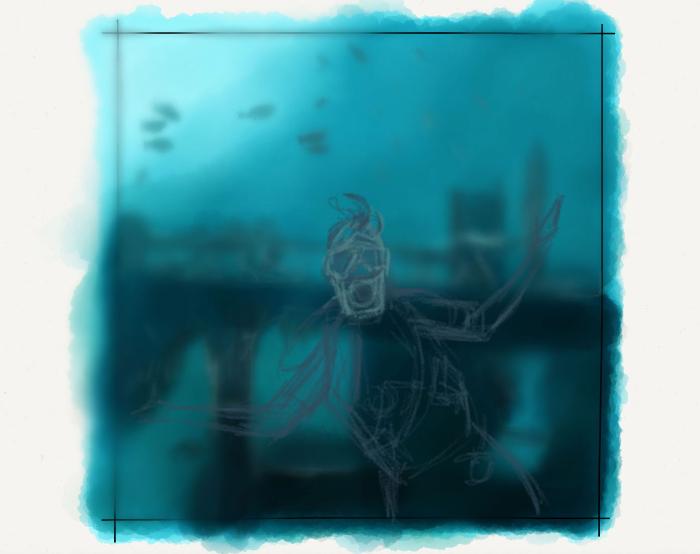
With our background in good shape make sure Pencil and start smudging away. Using a circular motion softly move your finger tip over the background to blur it evenly.
When done correctly the water should look almost dreamlike with a uniform blur across the entire plane. To finish, add details like bubbles, more fish, or plant life to the scene. If you don’t blend them they will automatically look as if they’re floating above the water adding a nice sense of depth to the scene.
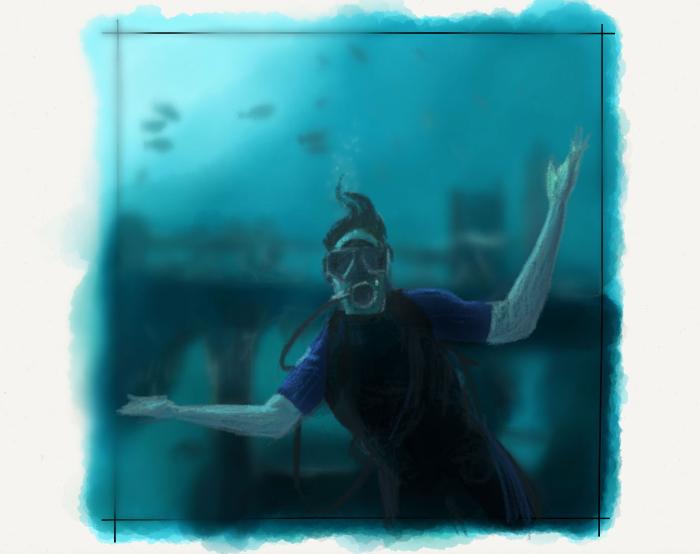
By leaving the edges around the scuba diver sharp, the figure will pop-off the page as it contrasts against the soft background.
Clouds, smoke, and fog
Building on the techniques found in my Mastering Paper: Drawing Clouds tutorial, a few well placed cloud smudges can greatly improve their realism. You can also modify the type of cloud on display by varying the speed of your blends.

Use quick blends for fluffy clouds and slow dragging smudges for for streaky ones.
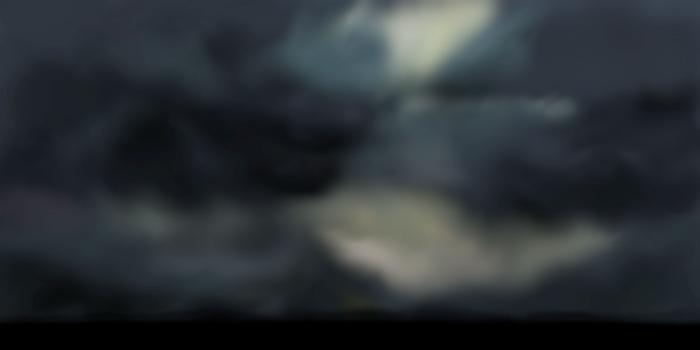
These techniques can be used for much more than enhancing clouds. They also work great for softening pencil strokes, turning them into the beautiful aurora borealis (the Northern Lights).
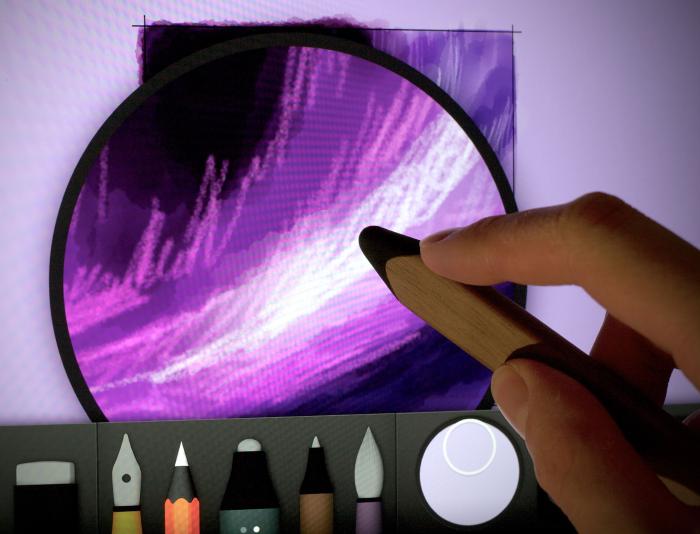
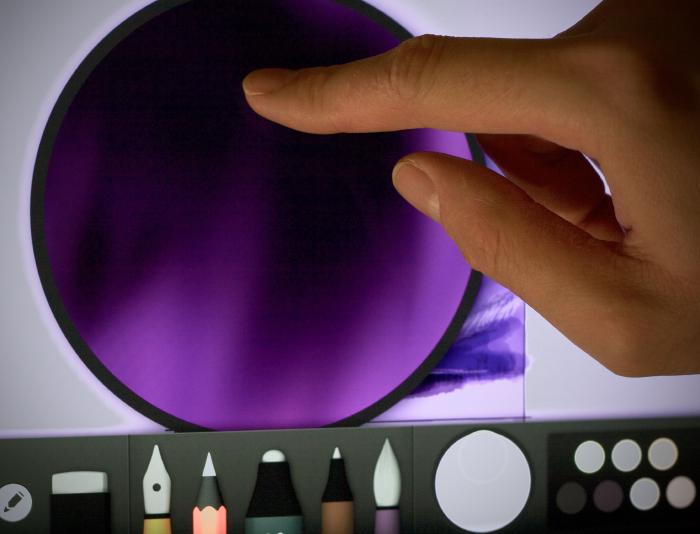
Give light trails a sense of motion by pulling your blend strokes slowly. Practice smudging the aurora borealis on Mix.
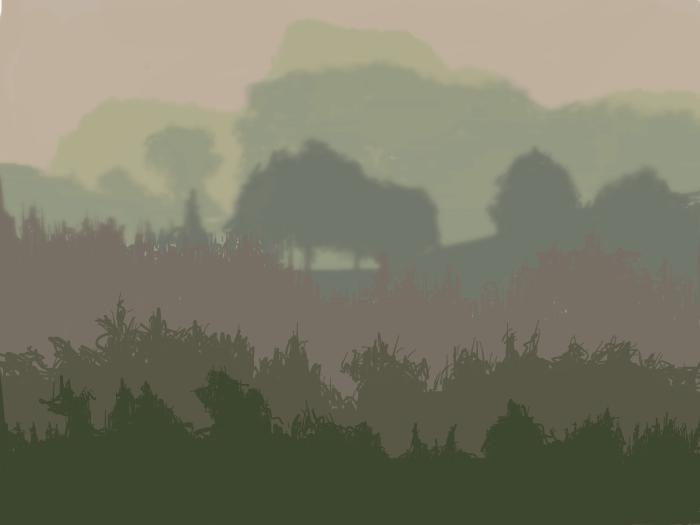
Simulate atmospheric perspective
One way of adding depth to a landscape is by adhering to the properties of atmospheric perspective. Simply put — far away objects appear more faded than those in the foreground.
Now you could be meticulous with your color choices and purposely mix gray and blue as you paint to get a similar effect. But if you’re anything like me you wouldn’t mind a shortcut to speed things up.
In this digital drawing of trees, the layers near the top are the most heavily blended. While the dark green trees at the bottom remain sharp and untouched.

Blend the plane (or object) furthest from the foreground the most and gradually decrease that amount as you move forwards.
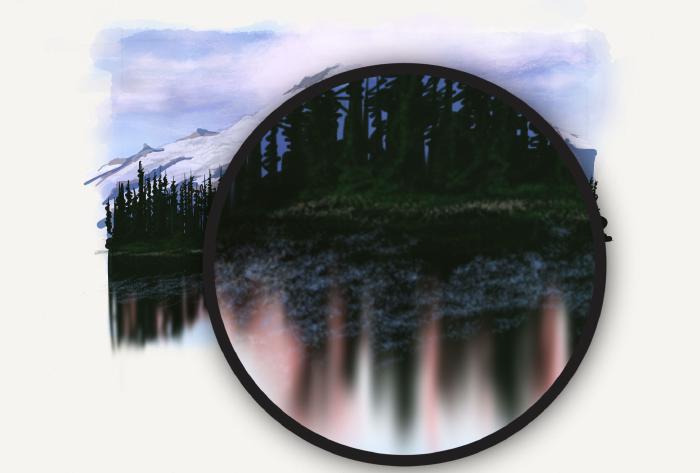
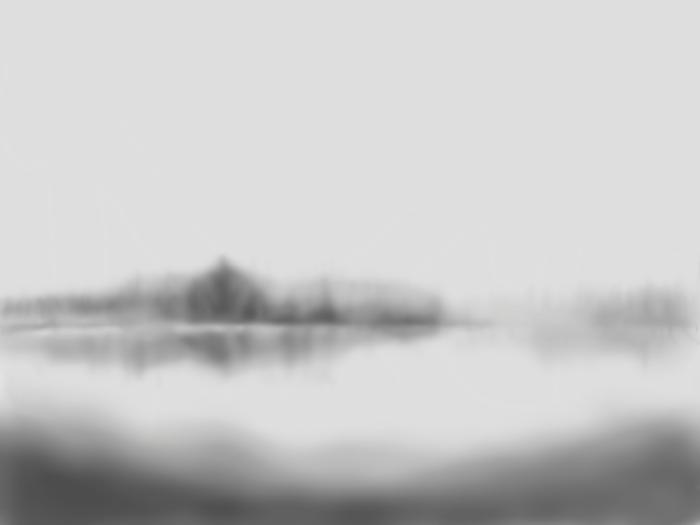
Very similar to the reflection example from earlier, you can create a dense layer of fog by blending everything — not just the reflected trees. By smudging over the drawing it effectively lowers the contrast making it appear hazy.

Start by drawing the horizon line so you know where to place the trees and those that will be reflected below in the water. Then cover the canvas in circular blend strokes to blur everything.
The fog effect is achieved by covering the canvas in circular blend strokes to blur everything. Once blurred subtle details can be added to define the tree tops and small waves in the water.

Lighting effects
Before Pencil and Blend were a thing you had to get creative with white paint to make lens flares and other glowing orbs of light. With a few quick swipes of your finger you can easily transform plain shapes and lines into lightsabers, auras, lightning, and more.
Outer space scenes
Galaxies far far away, stars, planets, black holes, and countless other celestial bodies can also benefit from blends and smudges. For in-depth instructions and videos be sure to check out my Mastering Paper: Drawing Outer Space guide.
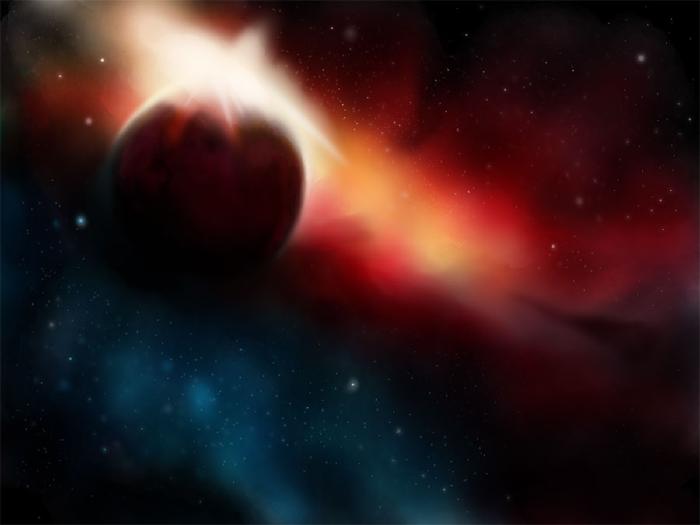
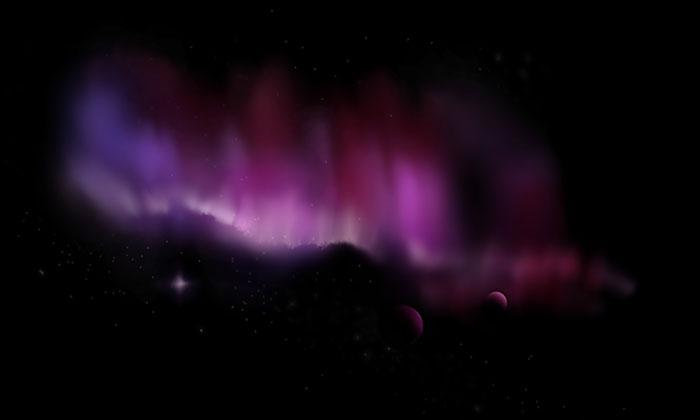
The two sets of tutorials show how to smear color around a black canvas to create planets and glowing stars. And for those of you who don’t own Pencil yet I walk you through how to create a similar scene with your fingers.
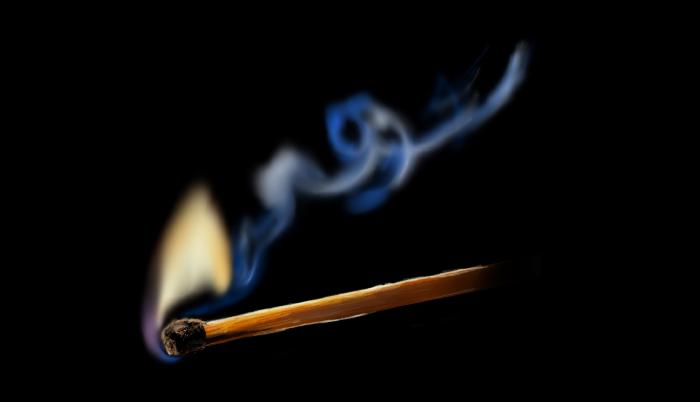
Simulate fire and flames
By alternating between quick blends and slow smudges you can create realistic looking flames and fire. It takes some practice to get the speed right, but once mastered I think the end results speak for themselves.

Flames aren’t the only thing you can smudge into existence. Pencil strokes can be transformed into smoke trails just as easily with slow blends.
How to improve blends
The temptation is high to abuse the Blend feature in Paper — especially after learning about all these awesome effects. It’s easy to turn a drawing into a smeared mess resembling something you’d find on Photoshop Disasters if don’t know when to quit, a fact I learned the first time I tried to blend a face.
Fear not, here are pointers to help keep your blends, blurs, and smudges in check.
Paint over a blend
A nice way to recover from over worked blends is by applying layers of watercolor on top. This helps restore balance by upping the texture and downplaying the airbrushed look. Thoughtfully placed pencil strokes can also have the same effect when combined with the right color.
Bring life back to aggressive blurs by adding texture with sketch or watercolor strokes.
Feather touches
Getting the intensity of a blur right isn’t always easy. To make a subtle blend you have to graze the iPad’s screen as you quickly swipe against it. This works OK when you’re covering a large area, but for small area blends it can be a real challenge.
The trick is to be fast. By barely touching the iPad’s screen while you swipe it fast, you can create blends that aren’t as harsh.
Phew — this was a long one! I covered a ton of material so if anything is unclear or needs further explanation, please let me know.
And if you create something cool with Blend feel free to share in comments below, or ping me on Twitter. I’m always interested to see what the Paper community is doing with FiftyThree’s set of tools.
The shifting quality of weight, value, and texture of a line as related to a light source, spatial position, and mass of an object. ↩︎
Abrupt changes between shades of the same color. ↩︎
In photography, bokeh is the aesthetic quality of the blur produced in the out-of-focus parts of an image produced by a lens. Bokeh has been defined as “the way the lens renders out-of-focus points of light”. ↩︎
Made Mistakes is a participant in the Amazon Services LLC Associates Program, an affiliate advertising program designed to provide a means to earn fees when linking to Amazon.com and affiliated sites. For full details read the complete disclosure policy.
5 comments
Wow. You’ve taken this tool as far as it can go nice work. I love sketching with my pencil. I hope they continue to develop it…
I wanted to learn a little something about the 53 Pencil before the anticipated Saint Nick delivery of one.
Wow. You’ve covered a ton of techniques.Thank you ever so much.
Michael, this and all of your Paper tutorials are fantastic. Thank you so much for sharing your techniques and tips. Question, can you provide all of these in an ePub or PDF format so one can download them and read it in iBooks? I would very gladly pay for something like this. Just a thought.
ANDROID APP PLEASE. Very sad user base, so many Android users want this.