Quick tips for iPad sketching
How do you draw or sketch on an iPad with Paper by FiftyThree? What iPad stylus is the best for creating art? Why does it burn down there when I pee? Wait a minute… I don’t have an answer for that last one, but I think I can help with the first two.
Tools
- Obviously you’ll need an iPad — I use a 3rd generation with the nice retina screen.
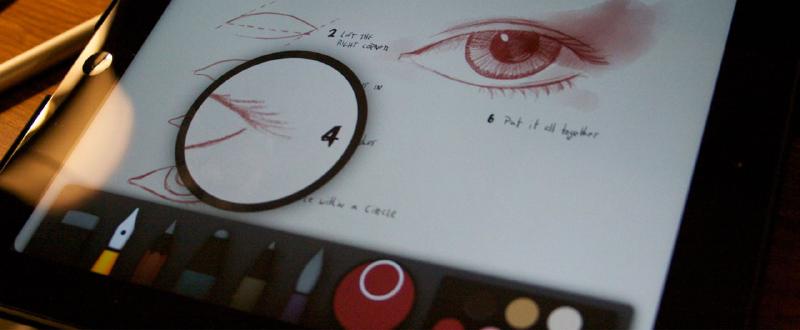
- Paper for iOS is my sketching app of choice. It’s a free download, but you’ll want to buy the additional brushes, pens, and Color Mixer — my favorites are the pencil and watercolor brush.
- A stylus is optional, but highly recommended. I use FiftyThree’s Pencil and in the past a Pogo Connect Smart Pen, LunaTik Alloy Touch Pen, and Just Mobile’s AluPen. If you can’t afford a decent stylus right now Amazon has dirt cheap styli for a few dollars that offer more precision than finger painting but not much else.
Every drawing is different and I try to keep that in mind before opening Paper for iOS. With that said, the following are some general steps and techniques I utilize when drawing and painting on a 3rd generation iPad with retina screen.
One thing to remember is, experimenting with all the tools and drawing everyday will up your game. I’ve learned so much doing just that for the last couple of months.
Block out your composition
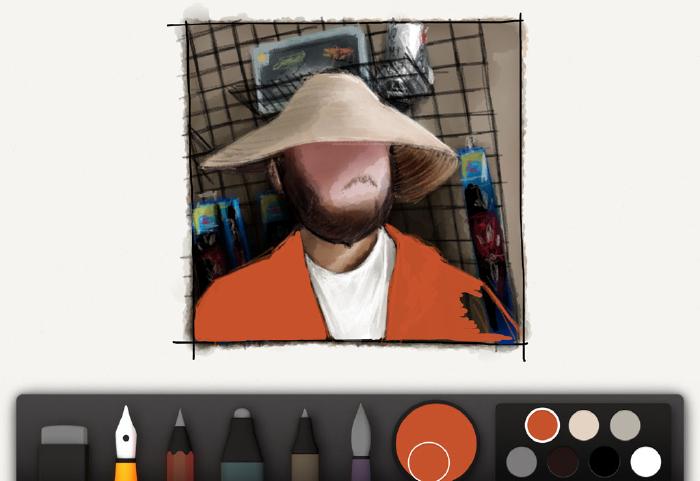
When I begin a new PaperFaces portrait, I start by sketching an imperfect square with the pen tool. I use the square as a rough guide for the composition because I like the look of shapes and lines bleeding outside the border. An alternative would be to use the eraser to straighten up the edges, if you like things neat and tidy. You could of course forgo the square and fill the entire page — whatever works for you.
Usually I pencil in quick gestural outlines as a guide for painting forms later. Other times I jump right to the background and splash in layer upon layer of watercolor. It really depends on the source material and if the background has enough detail to bother with.

Watercolor without water
If you ask me, this tool is what sets Paper for iOS apart from all the other iPad drawing apps like Procreate and Sketchbook Pro. I use the watercolor brush in two ways… well maybe three.
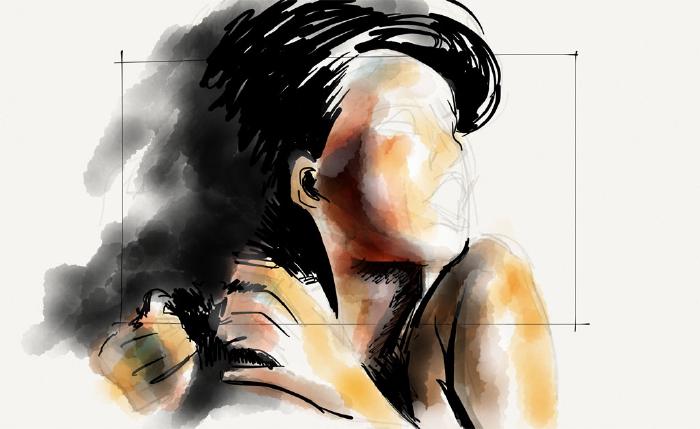
When crisp edges aren’t a concern, I’ll block in color with the watercolor brush. I achieve continuous tones by painting slowly and never removing the stylus (or my finger) from the screen. If I want to create a smooth gradation in color I move the brush progressively faster to fade it out.
Highlights and shadows
Brightening existing areas is achieved with the watercolor brush. Mix enough white into a color and the brush can be used to lighten. This technique is perfect for adding highlights or correcting mistakes when an eraser’s edges might be too harsh. When working with white my general rule of thumb is to move fast. If you stick around in one location too long it’ll lighten too fast. The same is true when using full black…
To shade existing areas apply a darker hue, gray, or black. For backgrounds I tend to use a light blue-gray to paint in shadows. I prefer to start light and layer glazes to add depth and contrast gradually. When working on a subjects’ face, I’ll use a dull brown to add dimension and shape. Applying a coat of gray or brown works wonders on hair as well.
Filling shapes with ink
I don’t use the fountain pen or marker tools all that much because I like my illustrations to have a more painterly feel to them. These tools are perfect for covering large irregular shaped areas with a base color — like hair.
They also come in handy when I need to rework or make adjustments (more precise than the eraser) to something I already drew or painted.

Two things to keep in mind when working with the marker tool:
- It has some translucency to it. If you draw over something, it will most likely show through. Because of this, the marker can help you shade more precisely than the brush since the tip is narrower.
- Black, white, and some dark colors are opaque, meaning they will cover up anything you draw over.
The multipurpose Pencil
I saved the best for last. When I first started using Paper for iOS, I was enamored with the thick and thins of the fountain pen and how true to life the watercolor brush handled. But then I rediscovered an old friend, in a digital world — Mr. Pencil.
Need to lightly sketch out a face… pull out the pencil. Need to smoothen out some edges… pull out the pencil. Need to add shadows and highlights… pull out the pencil.
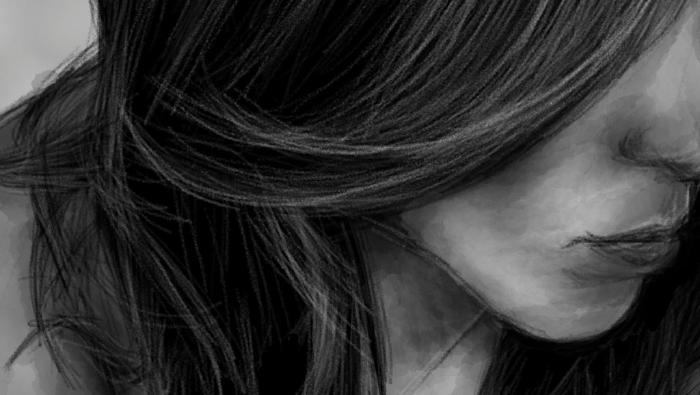
It has so many uses, that by default I spend most of my time with it. My absolute favorite is to use a white on top of a black (or dark background) and sketch in highlights. It’s sick how easy achieving realistic looking hair is when using the pencil.

Closing thoughts and questions
I hope some of this has been helpful. To better describe and show my process, I’ve recorded speed paintings done with an iPad 3, Paper by FiftyThree, the Mac OS X application Reflector, and edited with Adobe AfterEffects.
I’ve taken the liberty of embedding a video playlist below, demonstrating how I use Paper by FiftyThree to paint portraits. (Pro tip: watch it fullscreen). Feel free to comment, like, or subscribe to my channel if you like what you see.
If I missed anything or you’re looking for more pointers leave a comment below or tweet me.
Made Mistakes is a participant in the Amazon Services LLC Associates Program, an affiliate advertising program designed to provide a means to earn fees when linking to Amazon.com and affiliated sites. For full details read the complete disclosure policy.

33 comments
Is the difference between the polymer and alloy pens just the materials used to make them. (case) When I went to the website and thought i understood that to be the saw the only difference and since I am prone to loose things I thought the polymer was a better choice?
Yeah I’m pretty sure that’s the only difference. As far as I know the tips are the same, which is all that really matters. The alloy pens are probably heavier because of the material, but that shouldn’t affect drawing too much.
You should be fine getting the cheaper plastic one and saving your money.
Is there any way to get the greyish background edited out on the paper app? I’m trying to use some lettering I did for a blog header.
Yes there is a way to save it without the background. Just zoom out the page and hit the Share circle button. Then if you tap on the Camera Roll icon it’ll give you an option to toggle to background on/off. Just turn it off, save to your Camera Roll and then you can email or share it through Photostream.
It’ll give you a
.pngfile with a transparent background.I really enjoyed the review of Paper. I will be using this app. Is there a user friendly app that you know of like Paper to make simple animations with?
No sorry I don’t know of any simple apps for creating animations.
When you buy Pencil does it give you all brushes if you don’t already have them?
Yes. Any time you connect Pencil to Paper it unlocks all of the tools.
Hi Michael, i am quite struggling while using the Pencil on paper 53 app. I was really excited when i received it yesterday, it does amazing job to some extent. The main problem i am facing right now it falls out of track from its right course of action. I mean while i am using the brush tool with the pencil it slips off many times and instead of putting color on paper it starts blending; which is quite annoying. my assumption was i can only blend colors when i am using my finger, then why the pencil tip is doing that? Is there something wrong with the pencil tip i got or i am not using it from right angle ! please advise …
Hi Rahat. What you’ve described is quite common so you’re not alone. I talk about this some in my Pencil review, but here’s a quick recap if you haven’t read it.
In my experience Blend sometimes misfires if you aren’t pressing hard enough when drawing. Pressing down on the tip while drawing registers as an input with Paper, while lightly gliding the tip across the screen might not.
There is a spring in the tip that I can only guess aids in decipher touches versus non touches. Paper tries to be smart about these touches too which is why sometimes you might observe a blend or stroke disappear or correct itself.
The more you use Pencil the less it happens, but it can still be quite annoying even after getting comfortable with the stylus. A possible solution is to turn off the Blend feature until you need it. It’s not ideal, but will solve the misfires. You can modify Pencil’s behavior by tapping the 53 circle in the upper right corner, tapping Pencil, and then flipping Finger between “Blend” and “Nothing” depending on if you want to use it or not."
Hi Michael, Thanks for your advise. I have replaced the original tip and its much better now. I quite like the blend feature of pencil, wondering if its possible to achieve such effect while using other stylus. anyways, i really appreciate your quick reply.
That is good to hear.
For now Pencil is the only stylus that enables the Blend feature. I really hope they add the ability to other Bluetooth enabled styli at some point. Or make so you can toggle it on/off even if you don’t use a stylus.
Wait, let me get this straight. I’m sorry if I’m too redundant. Even though I still don’t have the tools, “If” I buy a pencil, and connect it to paper, ALL tools would be unlocked? Is that it? Please correct me if I’m wrong because I’m dying to use the app with complete tools :[
Yes that’s correct. When you connect Pencil to Paper it unlocks the tools, but they only stay unlocked for 30 days. You’ll need to connect Pencil again and they’ll unlock for another 30 days. Rinse/repeat.
As far as I can tell it’s a measure 53 took to lock the tools down to those who actually “own” Pencil. Otherwise you could just connect a friend’s Pencil to your iPad once and have the tools for free. It’s not a big deal if you actually own Pencil and use it – the tools will stay unlocked that way.
Oh my gosh. Super thanks. Now all I have to think about and do is to buy that pretty darn pencil."
Hi Michael, I noticed while watching the time-lapse video you are able to fill in the blue background (:45 sec into the video) with the brush tool without going inside the lines of your characters, even in the tight places that are more narrow than the width of the brush (between the two center characters). Is there a technique for doing that? You didn’t use the zoom in loop so I’m not sure how you managed it. Whenever I try to fill in a tight spot (like the angle formed between neck and chin) with the brush tool, the brush tool width is too wide to fill it without going into the lines of the other parts of the drawing. Thanks. Love your lessons.
I’m using a Pogo Connect stylus to get a thinner stroke with the Paper’s brush tool. It currently is the only pressure sensitive stylus Paper supports. I wrote about it in greater detail but the basic idea is the harder you press the the wider the stroke.
So when I’m painting in smaller spots I barely touch the screen which thins out the brush to about half as wide as you can possibly get without a Pogo Connect.
For me that makes the Pogo extremely interesting because it lets you do things with Paper’s tools no other stylus can. There are a handful of other pressure sensitive styli on the market that look way better than the Pogo Connect, but sadly none work with Paper.
Worth noting, if you have an iPad Air or Retina Mini I wouldn’t bother with a Pogo Connect. They have horrible support and barely work since Apple changed the technology behind their screens.
Hi how i can have a full colored background in paper 53 ?!
Here’s instruction on how to change the background color.
Is there an undo feature? Accidental errant strokes have destroyed entire sketches. Help?
Yes there is an undo feature, Paper calls it Rewind. You use two fingers and rotate them in a counter-clockwise direction to step through undos.
FiftyThree just put out a nice example of building up a car from basic structures but what I can’t figure out is how to do the same sized circle multiple times. They also sent out an example a few weeks ago with a lattice of same sized circles. Too similar to be eye balled. How?
Thanks in advance … I hope. 8-)
Have you updated Paper recently? They added a new set of tools called Think Kit. These tools let you draw perfectly straight lines, circles, squares, and arrows. So what was done here is they drew one blue circle and then used the new cut tool to reposition and copy/duplicate the circle several times. Then drew over that with the pen tool freehand.
I have to admit that all I have done with the cut tool is select and throw it off the screen, probably because of the video. I’ll give it a try in the morning. Thanks for the response.
I just want to say that you are very talented and watching this video blew my mind. Incredible work!
Hi Michael, I just discovered your lessons as I am just getting into iPad art and I think they are really awesome! I apologize if I am being redundant about anything, but exactly which iPad are you using for this? I have an iPad Air 1 and am having trouble finding others who use this iPad and know which styli work with it. I understand apple changed the technology in the air 2, which is why I am often confused whether a stylus will work properly with my iPad. Would you recommend the Pencil to use with Paper, or the Pogo Connect, specifically on the iPad Air 1? I’ve been reading great things on both styli but am unsure if it is for Air 1 or 2.
Thank you for taking the time to read my unnecessarily wrong message, and I look forward to hearing back!
Keep up the great work!
@Cari - I have an iPad Air 2 and you can read up on my stylus recommendations here. Pencil has good compatibility with older devices and does work with the Air.
I don’t have first hand experience with the newer Pogo Connect, but it does support the older iPad Air if you want pressure sensitive tips (something FiftyThree’s Pencil does not have).