How to make time-lapse videos on iPad
Most of my iPad time-lapse videos were made using Reflector1 to record the screen. With editing done later to adjust timing, include music, and add overlays in Adobe AfterEffects.
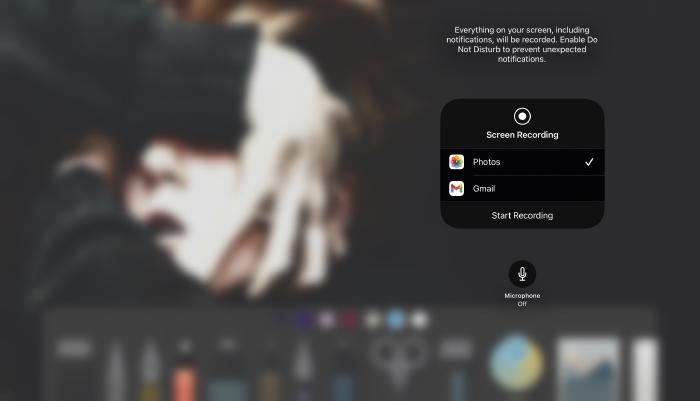
Screen recording
Apple has built screen recording directly into iPadOS and iOS, allowing you to capture the screen directly on device without needing any other software or hardware.
You can also capture the iPad’s screen on a Mac using the QuickTime Player app by selecting the New Movie Recording option from the File menu.

Then changing from the built-in FaceTime camera to an iPad or iPhone connected to your Mac via Lightning cable.


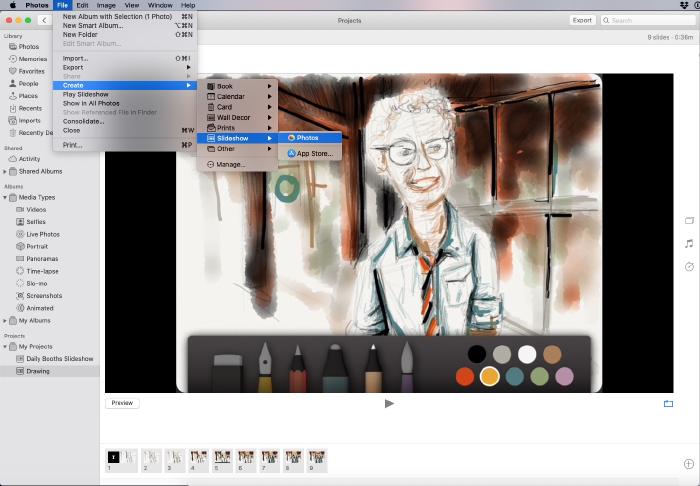
Slideshow time-lapse
My earlier attempts were more slideshow2 than time-lapse. I’d manually take a screenshot3 of the screen every few seconds, bring import into the Photos app (previouly iPhoto), then create selected a Create Slideshow from the File menu to convert hundreds of images into a QuickTime movie.
These movies weren’t the greatest since you couldn’t see any of the physical marks happening. But still neat to see a drawings progression in a low tech kind of way.
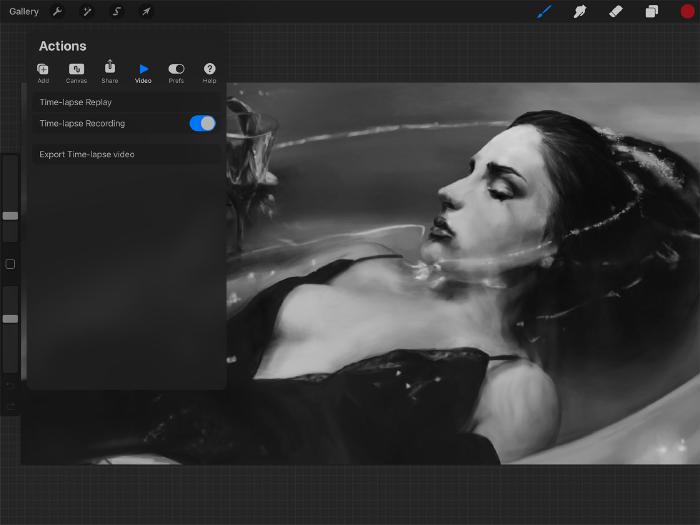
Apps like Procreate have taken this a step further by integrating time-lapse recording into their software. Each stroke, transform, and edit are recorded and able to view and export at any time.
Traditional time-lapse
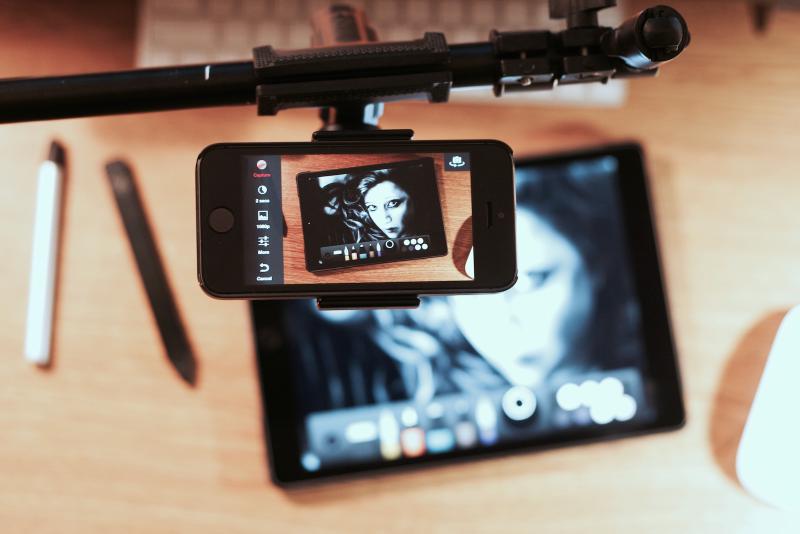
My preferred method of creating iPad time-lapses would be to record off device at select intervals. Meaning, having a setup where I’m able to capture myself, the work area, and the iPad all in view at once. There’s so much more value there since you can see fingers or styli interacting with the iPad.
I’ve experimented with traditional time-lapse photography using the following tools to record a drawing session:
- Reflector arm stand
- Clamps
- iPhone
- Lapse It app
I’ve had mixed results with the final videos as removing glare from the iPad’s screen is a real challenge. If my work environment was more controlled and I had a studio lighting setup, the results would be more impressive I’m sure.
To take a screenshot, press iPad’s power and volume up buttons at the same time. For older models with a home button, press the iPad’s power and home buttons at the same time. If done correctly a thumbnail image will appear on screen after a sound of the camera’s shutter closing plays. ↩︎
Made Mistakes is a participant in the Amazon Services LLC Associates Program, an affiliate advertising program designed to provide a means to earn fees when linking to Amazon.com and affiliated sites. For full details read the complete disclosure policy.