Optimizing and automating my Jekyll site build
Not going to lie — I love Jekyll, but huge static sites like mine take forever to build. What used to take seconds now go on for over 30 minutes, as thousands of files are generated and optimized.
Inspired by Anne Tomasevich’s post, Optimizing Jekyll Performance with Gulp — I begun digging into my build process to identify performance bottlenecks.
At the time of writing this post, my site contained roughly:
- 1,028 images generated at different sizes (5,140 in total).
- 1,052 total documents (991 posts / 14 pages / 3 sets of collections).
- 535 comments stored as YAML data files.
And was built with the following Jekyll plugins: jekyll-picture-tag, sort_name, jekyll-archives, jekyll-assets, jekyll/tagging, jekyll-tagging-related_posts, jekyll-sitemap, jemoji, and jekyll-typogrify.
Using Jekyll’s profiler flag --profile, I measured how long the following tasks took to complete1. Before each build I ran jekyll clean to wipe _site, .asset-cache and any other temporary files to keep results more consistent.
| Task description | Windows | Mac |
|---|---|---|
Generate responsively sized page.image.feature images | 1288.29s | 1429.26s |
Minify HTML with layout: compress | 39.35s | 11.18s |
Read /images/ and copy to _site/ | 32.39s | 23.63s |
| Build tag pages with jekyll-archives | 17.40s | 9.99s |
Build tag index page with sort_tag filter | 2.62s | 0.59s |
List related posts with jekyll-tagging-related_posts, jekyll/tagging, and LSI: true | 38.36s | 17.87s |
List related posts with vanilla related_posts | 1.65s | 4.90s |
| Preprocess, concatenate, minify, and cache bust SCSS and JS with jekyll-assets | 78.75s | 25.03s |
Display masthead and overlay menu from _data | 9.66s | 7.82s |
List post comments from _data | 7.10s | 2.22s |
Display colophon from _data | 0.20s | 0.49s |
| List post taxonomy metadata | 3.48s | 1.18s |
| List post breadcrumb links | 2.83s | 1.03s |
| List featured posts | 0.20s | 0.44s |
| Build style guide collection | 1.16s | 0.31s |
| List post social sharing links | 5.09s | 0.97s |
Is Jekyll faster on macOs or Windows?
For giggles I also tested my Windows and Mac development environments against each other. While not exactly an apples to apples comparison I thought it would be interesting to note any variations.
| Windows Environment | Mac Environment |
|---|---|
| Lenovo ThinkStation E30 | iMac 21.5-inch, Late 2013 |
| Processor 3.30 GHz Intel Xeon E31245 | Processor 2.7 GHz Intel Core i5 |
| Memory 16 GB | Memory 16 GB 1600 MHz DDR3 |
| Intel SSDSA2BW160G3L 137GB | 1.12 TB Fusion Drive |
| Windows 7 Professional Service Pack 1 | OS X El Capitan 10.11.6 |
| ruby 2.2.4p230 [x64-mingw32] | ruby 2.1.0p0 (2013-12-25 revision 44422) [x86_64-darwin12.0] |
Optimization
The numbers above don’t lie. Relying on Jekyll and friends to do jobs more suited for a task runner like Gulp was slowing the build. Armed with this knowledge I started stripping down Jekyll to one of its core purposes — converting Markdown files into HTML.
Doing this also allowed me to make my site’s content more portable and not as reliant on a specific static-site generator. In the off-chance I wanted to swap Jekyll for another SSG like Hugo or Gatsby, I could.
CSS and JavaScript assets
Jekyll Assets is a great plugin that served me well for a long time by: preprocessing, vendor prefixing, concatenating, minifying, and fingerprinting assets. But with a site of my size it was painfully slow to iterate with during front-end development.
Making a change to a Sass partial would trigger a full site rebuild, which meant waiting a few minutes before it could be previewed in a browser. Jekyll’s incremental build feature might have helped here, but I never had much luck getting it to work reliably.
During development CSS or JavaScript changes would ideally be pushed instantly to the browser with something like Browsersync. By replacing Jekyll Assets with the following Gulp alternatives I was able to do this, and improve build times by 93%:
- node-sass and gulp-sass: natively compile SCSS files to CSS.
- gulp-autoprefixer: vendor prefix CSS.
- gulp-cssnano: minify CSS.
- gulp-concat: concatenate JavaScript.
- gulp-uglify: minify JavaScript with UglifyJS.
- gulp-sourcemaps: add source maps for CSS and JS.
- gulp-gzip: gzip CSS and JS.
- gulp-rev: append hash to CSS and JS filenames for cache busting.
| Task description | Jekyll Assets | Gulp |
|---|---|---|
| CSS and JavaScript asset pipeline | 25.031s | 1.577s |
Here’s a small taste of the Gulp file I’m using for the site’s styles if you’re curious:
// 'gulp styles' -- creates a CSS file from SCSS, adds prefixes and creates a Sourcemap
// 'gulp styles --prod' -- creates a CSS file from your SCSS, adds prefixes,
//   minifies, and cache busts it (does not create a Sourcemap)
gulp.task('styles', () => {
  return gulp.src([paths.sassFiles + '/main.scss'])
    .pipe(when(!argv.prod, sourcemaps.init()))
    // preprocess Sass
    .pipe(sass({precision: 10}).on('error', sass.logError))
    .pipe(postcss([
      // add vendor prefixes
      autoprefixer({
        browsers: [
          'last 2 versions',
          '> 5%',
          'IE 9'
        ]
      })
    ]))
    // minify for production
    .pipe(when(argv.prod, when('*.css', cssnano({autoprefixer: false}))))
    .pipe(size({showFiles: true}))
    // output sourcemap for development
    .pipe(when(!argv.prod, sourcemaps.write('.')))
    .pipe(when(argv.prod, gulp.dest(paths.sassFilesTemp)))
    // hash CSS for production
    .pipe(when(argv.prod, rev()))
    .pipe(when(argv.prod, size({showFiles: true})))
    // output hashed files
    .pipe(gulp.dest(paths.sassFilesTemp))
    // generate manifest of hashed CSS files
    .pipe(rev.manifest('css-manifest.json'))
    .pipe(gulp.dest(paths.tempDir + paths.sourceDir + paths.dataFolderName))
    .pipe(when(argv.prod, size({showFiles: true})))
    .pipe(when(!argv.prod, browserSync.stream()))
});

// function to properly reload your browser
function reload(done) {
  browserSync.reload();
  done();
}

// 'gulp serve' -- open site in browser and watch for changes
//   in source files and update them when needed
gulp.task('serve', (done) => {
  browserSync.init({
    // tunnel: true,
    // open: false,
    port: 4000, // change port to match default Jekyll
    ui: {
      port: 4001
    },
    server: [paths.tempFolderName, paths.siteFolderName]
  });
  done();

  // watch various files for changes
  gulp.watch(paths.sassFilesGlob, gulp.series('styles', reload));
});
Without going too deep into how these Gulp tasks work, the gist is:
- A glob of files have “stuff” done to them using various plugins.
- These files are placed in a temporary folder excluded from Jekyll so they don’t trigger a full site rebuild during development.
- Production builds move these temporary files and deploys them alongside the HTML files generated by Jekyll.
Image assets
Resizing a thousand or so images to serve them responsively is no joke — taking over 20 minutes to complete in my site’s case. Up until now I was using the Jekyll Picture Tag plugin to do this work for me… which wasn’t ideal.
To try and see if Node and Gulp could do this faster I came up with a set of Gulp tasks to:
- Generate thousands of “feature” images2 at 4 different sizes with gulp-responsive.
- Optimize all images using gulp-imagemin.
- Save the optimized images directly to the destination folder — bypassing Jekyll and a full-site rebuild.
This helped some, but it wasn’t until I dropped GraphicsMagick for Sharp3 did I see a noticeable improvement…
Sharp really is as fast as they say
I shaved 18 minutes off my build time using this high speed Node.js module!
| Task description | Graphics Magick | Sharp |
|---|---|---|
| Resize and optimize 1,014 source images into 5 target sizes | 1288.29s | 171.00s |
The other missing piece was generating the necessary markup for responsive images4. Because I was no longer using the {% picture %} tag to output a fully formed <picture> element, I had to roll my own responsive image markup.
{% if page.image.feature %}
  {% assign f = page.image.feature | split: '.' %}
  <img src="{{ f[0] | relative_url }}-320.{{ f[1] }}"
       srcset="{{ f[0] | relative_url }}-768.{{ f[1] }} 768w,
               {{ f[0] | relative_url }}-1024.{{ f[1] }} 1024w,
               {{ f[0] | relative_url }}.{{ f[1] }} 1920w"
       alt="{{ page.title }}">
{% endif %}
This bit of Liquid takes the filename as defined by page.image.feature, splits it at the extension, appends suffixes that match those used in the gulp-responsive task, and adds them to the srcset attribute. Boom, resolution switching images!
Simplify layouts
With the bulk of the time savings coming from faster image resizing tasks, I went after some low-hanging fruit next by decluttering my layouts. Anything that detracted from the main content or added visual noise to the page was fair game for removal.
Remove social sharing module
Including buttons at the bottom (or top of post) didn’t really boost shares of my content on Twitter or Facebook — so I dropped them. If someone wants to share it on social media they’ll use the builtin methods of iOS/Android or do it the old fashioned way of copy-pasting a URL.
Replace layout: compress
Occasionally things on the site would break if inline JavaScript with // styled comments were used. This happened because of a complex set of Liquid filters used in my compress layout to reduce whitespace in the generated HTML.
The fix was easy, just surround inline JavaScript comments with /* */ instead. Or do what I did, stop using layout: compress and minify with these Gulp plugins instead: gulp-htmlmin and gulp-gzip.
// 'gulp html' -- does nothing
// 'gulp html --prod' -- minifies and gzips HTML files for production
gulp.task('html', () => {
  return gulp.src(paths.siteFolderName + paths.htmlPattern)
    .pipe(when(argv.prod, htmlmin({
      removeComments: true,
      collapseWhitespace: true,
      collapseBooleanAttributes: false,
      removeAttributeQuotes: false,
      removeRedundantAttributes: false,
      minifyJS: true,
      minifyCSS: true
    })))
    .pipe(when(argv.prod, size({title: 'optimized HTML'})))
    .pipe(when(argv.prod, gulp.dest(paths.siteFolderName)))
    .pipe(when(argv.prod, gzip({append: true})))
    .pipe(when(argv.prod, size({
      title: 'gzipped HTML',
      gzip: true
    })))
    .pipe(when(argv.prod, gulp.dest(paths.siteFolderName)))
});
Minifying HTML with Gulp
In my tests, replacing _layouts/compress.html with Gulp tasks to minify and gzip every HTML file ended up being slightly slower.
| Task description | compress layout | gulp-html and gulp-gzip |
|---|---|---|
| Minify HTML files | 39.348s | 47.00s |
I’m willing to live with the extra 8 seconds of build time as it helps avoid potential site breakages due to badly minified scripts…
Reduce and replace JavaScript
I’m close to ditching jQuery and going vanilla, but I’m not quite there yet. Where possible I’ve ditched jQuery plugins and replaced with “lighter” alternatives. Here’s a few highlights:
- Replaced Magnific Popup with Lity.
- Replaced Lazyload with Lazysizes + Lazysizes responsive images polyfill extension.
- Added SVG 4 Everybody for external SVG spritemap support.
- Replaced FitVids.JS with responsive embed CSS and a custom Jekyll video embed tag.
Results
Decoupling the asset pipeline from Jekyll and Gulp-ifying it made the biggest splash in terms of build time. Along with Browsersync, any asset (CSS, JavaScript, images and icons) updates could be previewed almost instantly. Greatly speeding up the time it takes to develop and iterate the site’s front-end.
Automation & Continuous Integration
After ditching Disqus last year to roll my own static-based solution powered by Staticman, I needed to find a better way of deploying the site. Merging in new comments, pulling those commits down, manually building the site locally, and then deploying to my web server wasn’t ideal.
With some research I determined a continuous integration5 platform like Travis CI6 that integrates with GitHub was what I needed.
Setting things up with Travis CI wasn’t too painful, but there was some trial and error getting dependencies squared away. I’d suggest reading through their documentation, but the basic idea is:
- Sign in to Travis CI with your GitHub account and grant it access.
- Configure the build and deployment scripts with a
.travis.ymlfile. - Set the type of triggers7 that initiate a build.
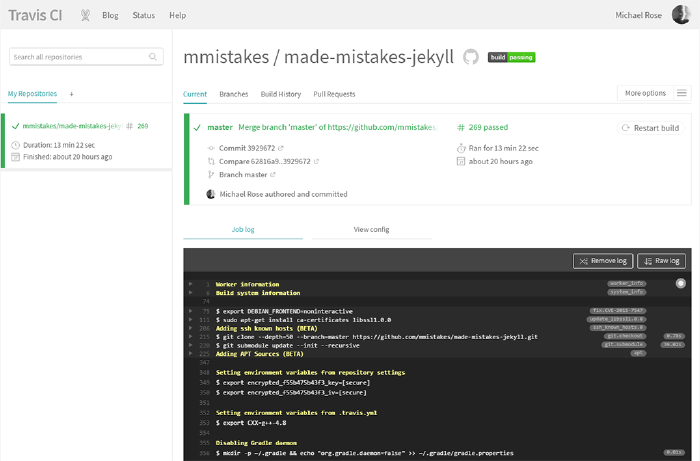
Travis CI configuration
Let’s take a closer look my .travis.yml config file and how I’ve set it up.
language: ruby
rvm:
  - 2.2
Since Jekyll is built on Ruby I set the language to ruby. Depending on what version of Jekyll you’re using you can change rvm to meet your needs. I went with 2.2 since that’s the latest Travis CI provides.
sudo: false
This enables quicker build start times using the new container-based infrastructure.
branches:
  only:
    - master
Fairly obvious, build only from the master branch.
cache:
  bundler: true
  yarn: true
  directories:
    - node_modules # NPM packages
Travis CI pulls down and installs gem and Node.js modules before every build. Depending on what you have in your Gemfile and package.json files this can take a bit of time.
The above lines enable caching of these dependencies eliminating this installation step.
addons:
  apt:
    sources:
      - ubuntu-toolchain-r-test
    packages:
      - g++-4.8

env:
  CXX=g++-4.8
Enables the GCC, GNU Compiler Collection using APT Addon and a newer version of gcc/g++ to properly install Sharp.
Travis CI build lifecycle
My build lifecycle breaks down like this:
- Clone repo and any submodules.
- Install
apt addons. - Install Ruby gems.
- Upgrade Node.js and install Yarn + Node modules.
- Run Gulp production build task
gulp build --prod. - Decrypt private SSH keys needed to rsync files to my server.
- Run Gulp deploy task:
deploy:
  provider: script
  skip_cleanup: true
  script: gulp deploy
  on:
    branch: master
With everything configured I no longer need to build locally and deploy. I can merge in comments or make small edits to Markdown files directly on GitHub, and automatically trigger a site build/deploy.
If there’s a problem Travis CI will notify me, otherwise in ~15 minutes (or however long the build takes) any changes committed will be live on the site.
Other Jekyll related bits
Pagination upgrades
Looking to wring a little more #WebPerf juice out of my site, I went after category and tag archive pages next. Depending on the tag, these index.html pages could be quite hefty due to the amount of HTML needed to display hundreds of post teasers.
To trim them down in size I needed a way of paginating these pages into small chunks. Jekyll has an official pagination plugin, but unfortunately it’s limited (and deprecated) in what it can actually paginate. Jekyll Paginate v2 on the other hand is fully featured, backwards compatible, and actively being worked on.
In addition to paginating posts it can handle: collections, categories, tags, and locales (useful if you have a multi-language site).
It doesn’t stop there though! It has a built-in generator called Auto-Pages to create tag, category, and collection archives. Which unlike Jekyll Archives, can all be paginated.
With a few changes to my _config.yml file and adapting my Jekyll Archive layout to work with Jekyll Paginate v2, I was ready to roll.
# Plugin: Pagination (jekyll-paginate-v2)
pagination:
  enabled      : true
  debug        : false
  per_page     : 15
  path    : "/page/:num/"
  title        : ":title - Page :num of :max"
  limit        : 0
  sort_field   : "date"
  sort_reverse : true

# Plugin: Auto Pages (jekyll-paginate-v2)
autopages:
  enabled      : true
  categories:
    enabled    : false
  collections:
    enabled    : false
  tags:
    enabled    : true
    layouts:
      - "autopage_tags.html"
    title      : ":tag" # :tag is replaced by the tag name
    path  : "/tag/:tag"
For category archives I created my own bespoke pages since there are only a handful of them. Mostly because it was easier to customize them than generating with Auto-Pages.
Step 1: Create an archive page… let’s use my Articles archive as an example. I like to keep all of my source pages grouped together, so I created articles.md and placed it in a folder named _pages.
Step 2: Enable pagination and define what categories it should filter, in this case articles by adding the following YAML Front Matter to articles.md.
pagination:
  enabled: true
  category: articles
Step 3: Output the posts by looping through the paginator.posts array. A simple example would look something like this:
<ul>
  {% for post in paginator.posts %}
    <!-- what you want to output. title, url, image, etc. -->
    <li><a href="{{ post.url }}">{{ post.title }}</a></li>
  {% endfor %}
</ul>
And for “next/previous” navigation links you can do something like this:
{% if paginator.total_pages > 1 %}
  {% if paginator.previous_page %}
    <a href="{{ paginator.previous_page_path }}">Newer Posts</a>
  {% endif %}
  {% if paginator.next_page %}
    <a href="{{ paginator.next_page_path }}">Older Posts</a>
  {% endif %}
{% endif %}
Lazyload tag
Another #WebPerf improvement was adding the ability to defer loading of images and video embeds.
To do this I created a custom Jekyll plugin using lazysizes to do some JavaScript magic.
| Attribute | Required | Description |
|---|---|---|
data-src | Required | Full path to image eg: /assets/images/filename.jpg. Use absolute URLS for those hosted externally. |
src | Optional | Full path to low-quality image eg: /assets/images/filename.jpg. Use absolute URLS for those hosted externally. Defaults to inline transparent .gif. |
alt | Optional | Image alternate text. |
Example:
{% lazyload data-src="/assets/images/my-image.jpg" src="/assets/images/my-image-low-quality.jpg" alt="my lazyloaded image" %}
A Liquid version of this method is used in the hero image include to apply a nice blur effect as those large images are loaded by the browser.
Responsive video embed tag
Custom Jekyll plugin to embed a video from YouTube or Vimeo that responsively sizes to fit the width of its parent using /_plugins/video_embed.rb.
Embeds are also lazyloaded to improve page performance.
YouTube embed
To embed the following YouTube video at url https://www.youtube.com/watch?v=fFX1CUO472U (long version) or https://youtu.be/fFX1CUO472U (short version) into a post or page’s main content you’d use:
{% youtube fFX1CUO472U %}
Vimeo embed
To embed the following Vimeo video at url https://vimeo.com/97649261 into a post or page’s main content you’d use:
{% vimeo 34948855 %}
Simplified breadcrumbs
Previously I was using some Liquid voodoo to build a trail of breadcrumbs. This sort of worked because my site structure isn’t too complex. On the other hand it wasn’t flexible and didn’t allow for overriding crumbs with more descriptive labels.
Since my content hierarchy is shallow I decided to manually assign breadcrumbs to each post with YAML Front Matter.
breadcrumbs:
  - label: "Blog Articles"
    url: /articles/
Then using this Liquid and HTML it’s outputted in my layout:
{% if page.breadcrumbs %}
  {% assign crumb = page.breadcrumbs[0] %}
  <a href="{{ crumb.url }}"><strong>{{ crumb.label }}</strong></a>
{% endif %}
For multiple levels of breadcrumbs the following YAML and sample for loop should get the job started.
breadcrumbs:
  - label: "Level 1"
    url: /level-1/
  - label: "Level 2"
    url: /level-2/
{% if page.breadcrumbs %}
  <ul class="breadcrumbs">
    {% for crumb in page.breadcrumbs %}
      <li><a href="{{ crumb.url }}">{{ crumb.label }}</a></li>
    {% endfor %}
  </ul>
{% endif %}
Popular tags
Looking over my site’s analytics I came to the conclusion no one was clicking on the “this post was tagged” links, so I removed them. To make category pages more sticky and useful including tags seemed more useful. So with the following Liquid I was able to build a list of the most popular tags filtered on the current category.
{% assign filterCategory = page.pagination.category | default: page.category %}

<ul>
  {% assign tagLimiter = 0 %}
  {% for tag in site.tags %}
    {% comment %}create an empty array{% endcomment %}
    {% assign postsInCategory = "" | split: "/" %}

    {% comment %}loop over site.tags{% endcomment %}
    {% for post in tag[1] %}
      {% if post.categories contains filterCategory %}
        {% comment %}if a post is in the filter category add it to postsInCategory array{% endcomment %}
        {% assign postsInCategory = postsInCategory | push: post %}
      {% endif %}
    {% endfor %}

    {% comment %}poor man's tag limit on those that are frequently used{% endcomment %}
    {% if postsInCategory.size >= 5 and tagLimiter <= 5 %}
      {% assign tagLimiter = tagLimiter | plus: 1 %}
      <li><a href="/tag/{{ tag[0] | replace:' ','-' | downcase }}/" >{{ tag[0] }}</a></li>
    {% endif %}
  {% endfor %}
</ul>
On my Mastering Paper category page about the iPad app Paper by WeTransfer, you’ll see related links to tags like Paper app, iPad, drawing, etc.

Well there you have it, the complete tale of how I took something inherently simple and overly complicated it to suit my needs. If you have any questions after looking over the source ask away in the comments below.
Each task was run 3 times and averaged as the values produced by
jekyll build --profilevaried quite a bit. ↩︎I classify “features” as large, often full-width images commonly seen in landing pages built with Bootstrap and other popular CSS frameworks. ↩︎
Sharp is super fast, but only resizes JPEG, PNG, WebP, and TIFF images… no GIF. It’s also a pain in the ass to install on Windows due to the
node-gypdependency. ↩︎In the last couple of years several “cloud” solutions have emerged to make serving responsively sized images easier. Cloudinary (free plan), imgix (paid plans), and ImageEngine (free plan) just to name a few. ↩︎
Continuous integration is a DevOps software development practice where developers regularly merge their code changes into a central repository, after which automated builds and tests are run. ↩︎
There are several CI platforms and services out there that can automate testing, building, and deploying a JAMstack site. Netlify, Circle CI, Codeship, Travis CI, and GitLab CI to name a few. ↩︎
Branch updates, pull requests, or both. ↩︎
13 comments
It would be great if you created a Jekyll starter kit and open sourced it :)
Wow, cool that you took inspiration from my generator! Sadly it’s fallen a bit on the wayside on my way to updating it to Webpack and whatnot. It’s on my todo list, but it’s been a while and the JS community moves so quickly that I have no idea where to start.
A lot of the thought process you have here are things I’m incorporating into my personal site’s rebuild. Thanks for the detail!
Great write-up! Thanks for all this insights.
How do you trespass the CORS message error in your comments?
I would like to use jekyll-paginate-v2, but still can’t use that plugin on gh-pages. :(
Why not use Netlify instead? They offer everything hosting with GitHub Pages does (free hosting, etc.) and more like being able to use whatever Jekyll plugins you want.
You can still continue to keep your repo on GitHub. All that’s really needed is to add a Netlify config file and setup an account and in most cases you’re good to go.
Cool article. Finally moving on to building bigger sites with Jekyll so always good to read the lessons of others who got there first.
This makes me want to use Jekyll. Thanks mate.
Drew Silcock wrote a post on how to integrate custom plugins with gh-pages. He uses branching and a nice little script to automate things. Might be worth a look.
Very informative article. Is it possible to follow your path but, use only npm packages instead of gulp?
Sure it’s possible, it’s all just JavaScript. So if you’re comfortable writing it, it could be done.